

Games are no longer small pixelated static images (or some simple animations) that just move across the screen. Many video games now contain fully immersive 3D worlds for players to explore. As humans, we rely a lot on the way light reflects of objects to understand depth and geometry. With the growth of the number of 3D games came the increased need to simulate how light interacts with objects in the physical world.
The concept of how we see things in the real world is simple: a ray of light from a light source bounces off one or more objects, until it hits the retina in your eye. The vast majority of rays misses our eyes, but there are plenty to go around to see what is around us. So… how hard can it be to translate this to games?
Simulating light rays is really inefficient. We could simulate a single ray from our light source, but the probability that it will reflect into our in-game eyes (the “camera”) is not quite zero, but it may as well be. Of course, we could always nudge the rays slightly in a direction that will make it reach the eye, but this is still a fairly complex project. This technique of rendering a scene is called _path tracing_, and is too slow to be used in real-time applications, such as games. That is why it is usually reserved for rendering things where time doesn’t matter much, such as films.
Luckily, the laws of physics of light are reversible in time, which means we could go backwards. After all, there are only so many pixels on the screen we need to give a colour, so we can just follow a hypothetical light ray shot from our eye and see if after some bounces we find the light. This has similar problems as path tracing, but due to the way the tracing works, we have more options for reducing the number of bounces and nudging the rays in a direction we want them to. Traditionally, this technique called _ray tracing_ was also only used for more extensive rendering tasks, but with the increased graphics performance and now the arrival of graphics cards optimized specifically for ray tracing, we can expect games to start using this.
Still, most games need to go faster than ray tracing. This is why most light models are very simplified. Light rays often don’t bounce of objects more than once. Things like mirror reflections are often neglected or cheated to make them look good enough. Once you make enough of these assumptions, suddenly it becomes feasible to calculate the illumination 60 per seconds. So let’s dive into how we determine how to light a point on an object.
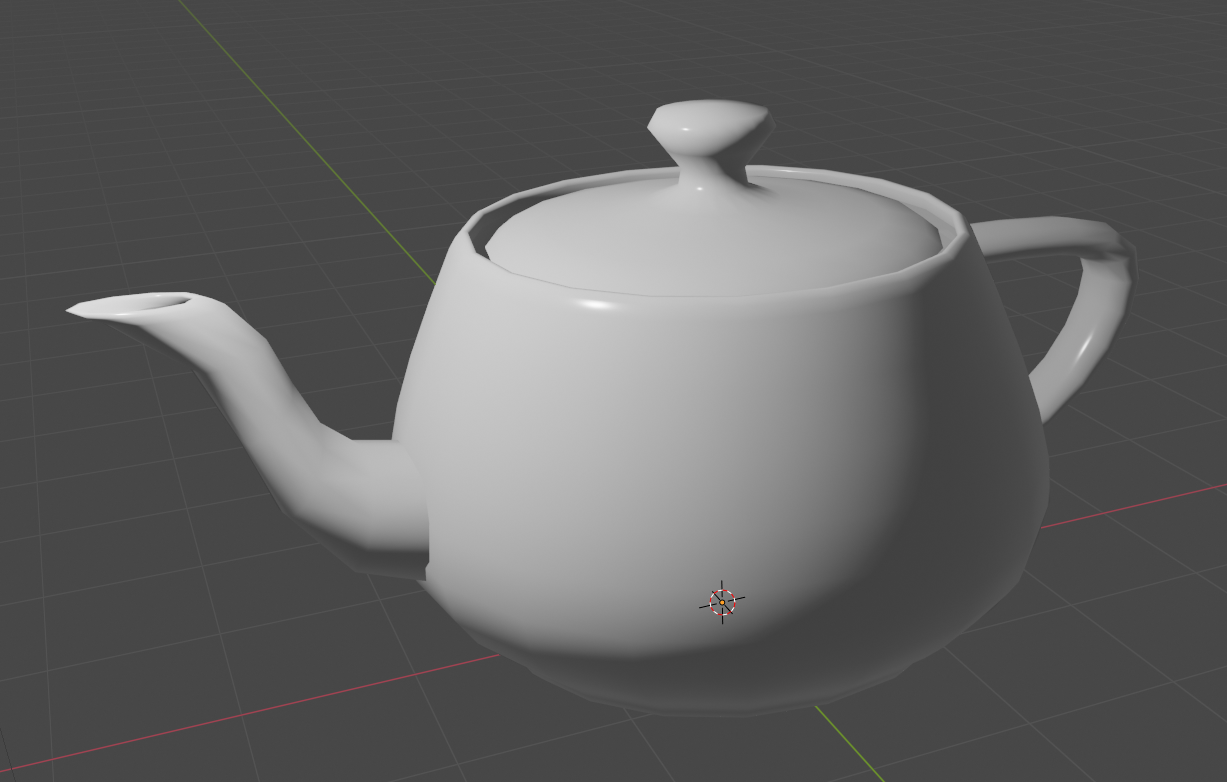
Most people are familiar with the fact that 3D models in games exist of polygons (usually triangles). These polygons are formed by taking points of the model, and connecting them. See for an example the teapot below. Note that you can click on all the images in this post to view them in their original size.
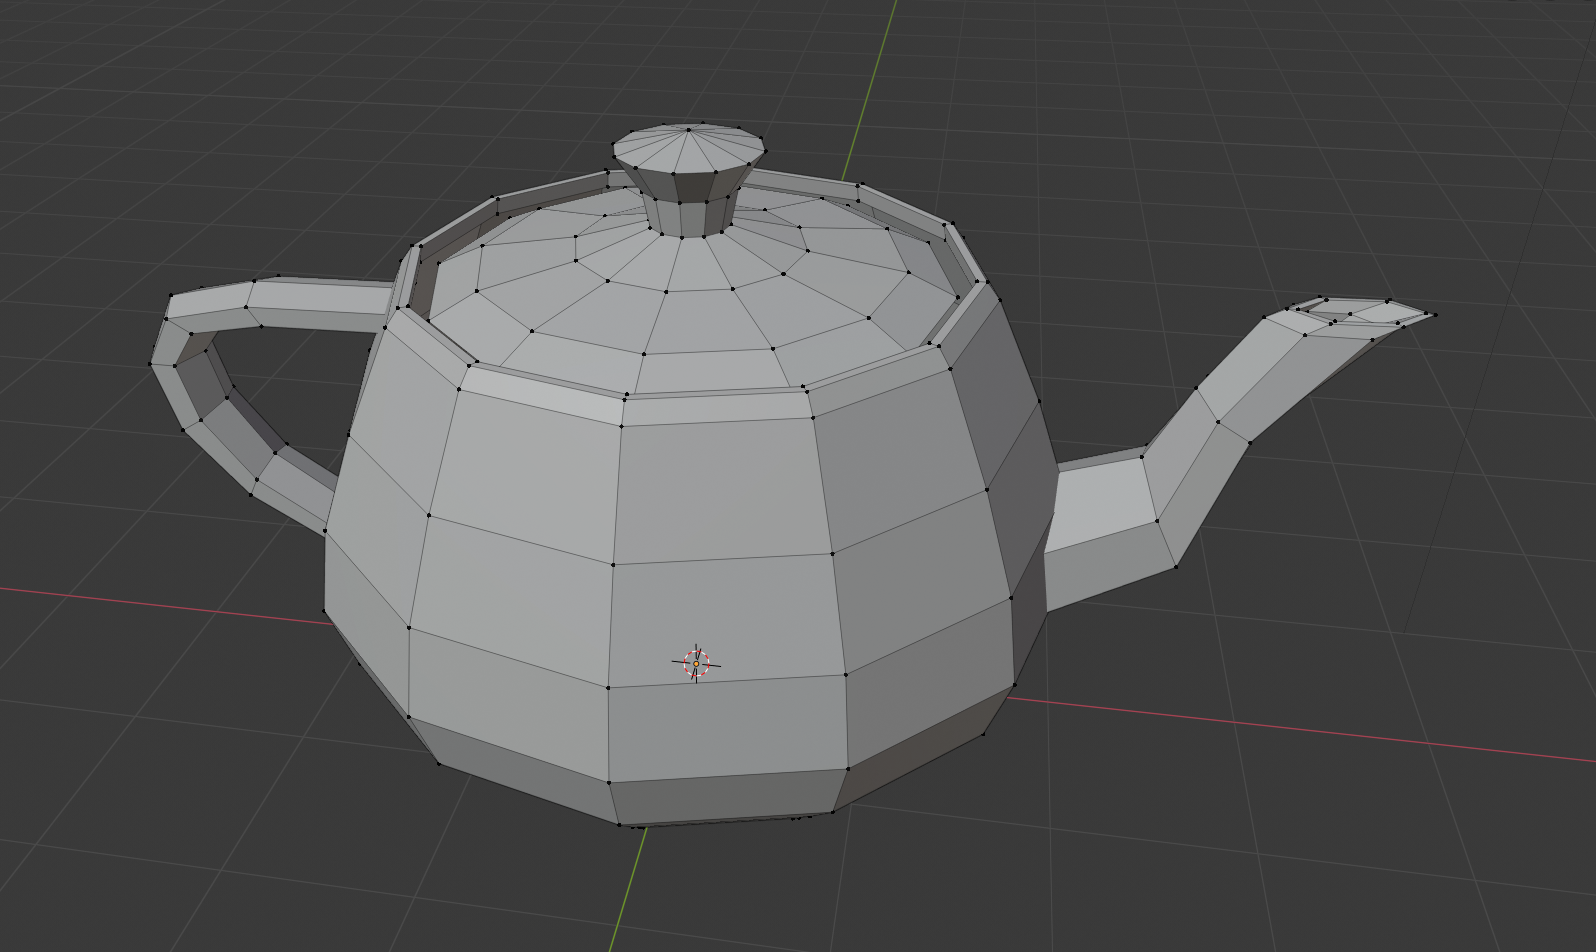
You might recognise this as the Utah Teapot, a famous 3D model used for testing, and also a bit of an in-joke for most graphics programmers and artists.
Each of the points in this object is what we call a vertex. Every vertex in a model has a position, which is what makes up the shape of the object. When it comes to calculating lighting on an object though, we don’t actually care about the position that much. Instead, we care about something called the normal. The normal is the direction that points away from the surface of an object. This sounds pretty intuitive in the real world, but in games and programming we often have to store the normal of a particular point, since we don’t have the concept of surface there (for example on the teapot, we don’t know which side is inside or outside). In the image below, you can see all the normals drawn.
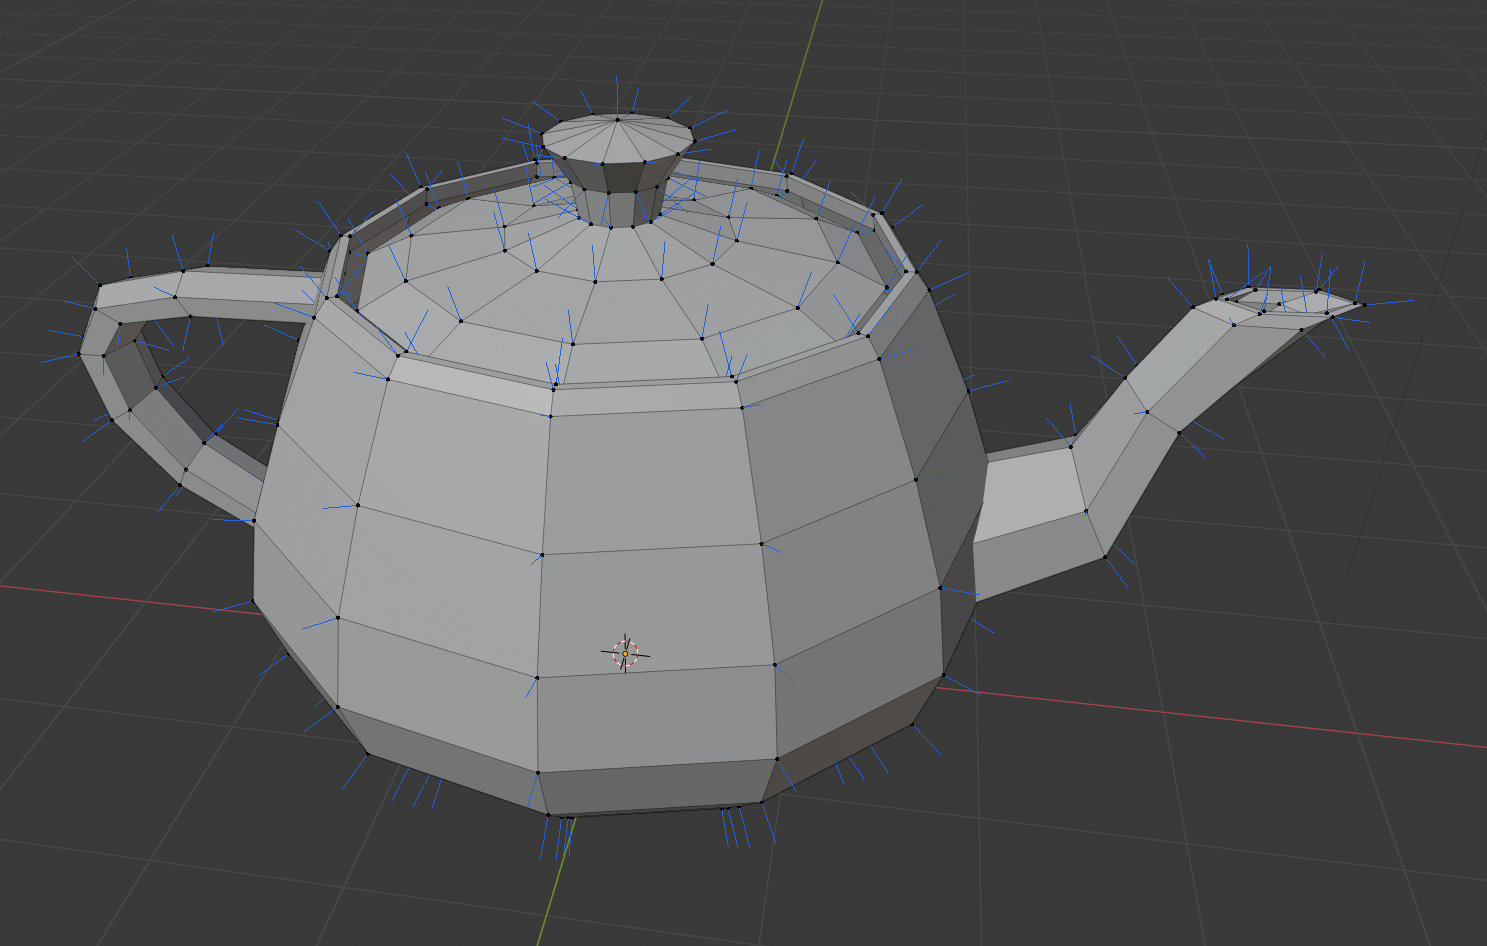
Normals are incredibly important for shading, because when we are dealing with light rays, we need to know in what direction they reflect.
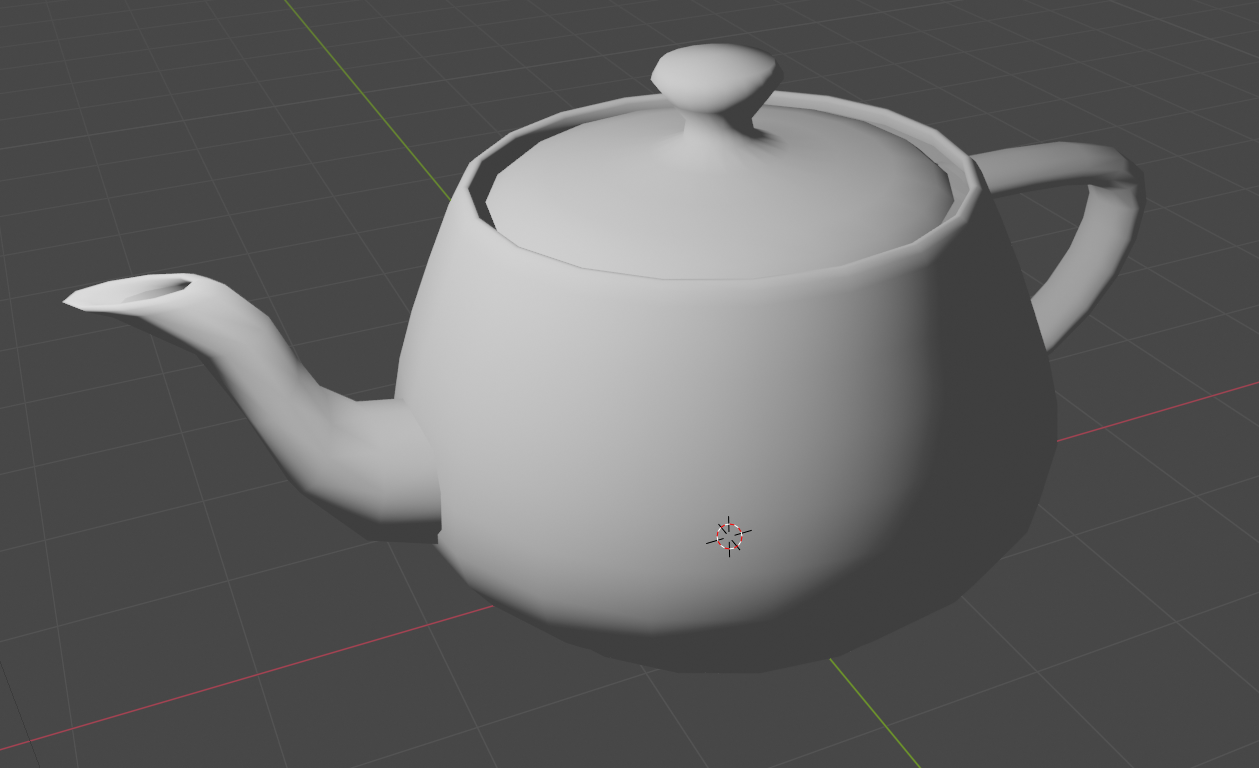
So now that we have the data we need, let’s look at how we can make the object look properly lit. The easiest shading model is something called Lambertian reflectance. This is a simplification of the real world and it says that when light hits a surface, the light gets reflected in all directions equally much. That means that no matter what side we look from, a point on the object will always have the same illumination.
To find out how much illumination exactly, we look at the normal of a point. If the normal points directly at the light source, the point is fully lit. If the normal points in the opposite direction, it is fully dark. For anywhere in-between, the point is partly lit (according to Lambert’s cosine law, if you want to be precise). You can try this out for yourself by taking an object with a flat surface, and rotating it towards and away from a light source. You’ll notice it looks darker as the surface moves away from pointing directly towards the light.
This model is the most common model used in graphics programming, and it is a good approximation for items with a diffuse material. Think of something like wood or clay. If you look at the teapot below, you actually notice it does look a bit unnatural.
Diffuse lighting is still an incredibly powerful tool. It is fast and simple to calculate (it can be done in a single line of code). If you add some textures, you can make a good looking game with just this. Still, there is more we can do.
When you have an object that is somewhat reflective (metal is a good example, porcelain as well to some extent), you can often see the reflection of the light in there. Even if it’s not completely reflective, there is a bright spot where the light reflects into your eyes.
To calculate the illumination based on this glossy model, we again use the normal. Since the normal always points directly away from the surface of an object, and a reflection always bounces off the surface in a predictable way, we can calculate for each point where the light ray gets reflected in a perfect reflection. If this is directly points towards the observer, we fully illuminate the point. However, usually it misses the observer’s eyes, and in addition, most objects aren’t fully reflexive. So based on how far off the ideal reflection angle the user is, we make the point on the object darker. The following image shows how that would look for our teapot.
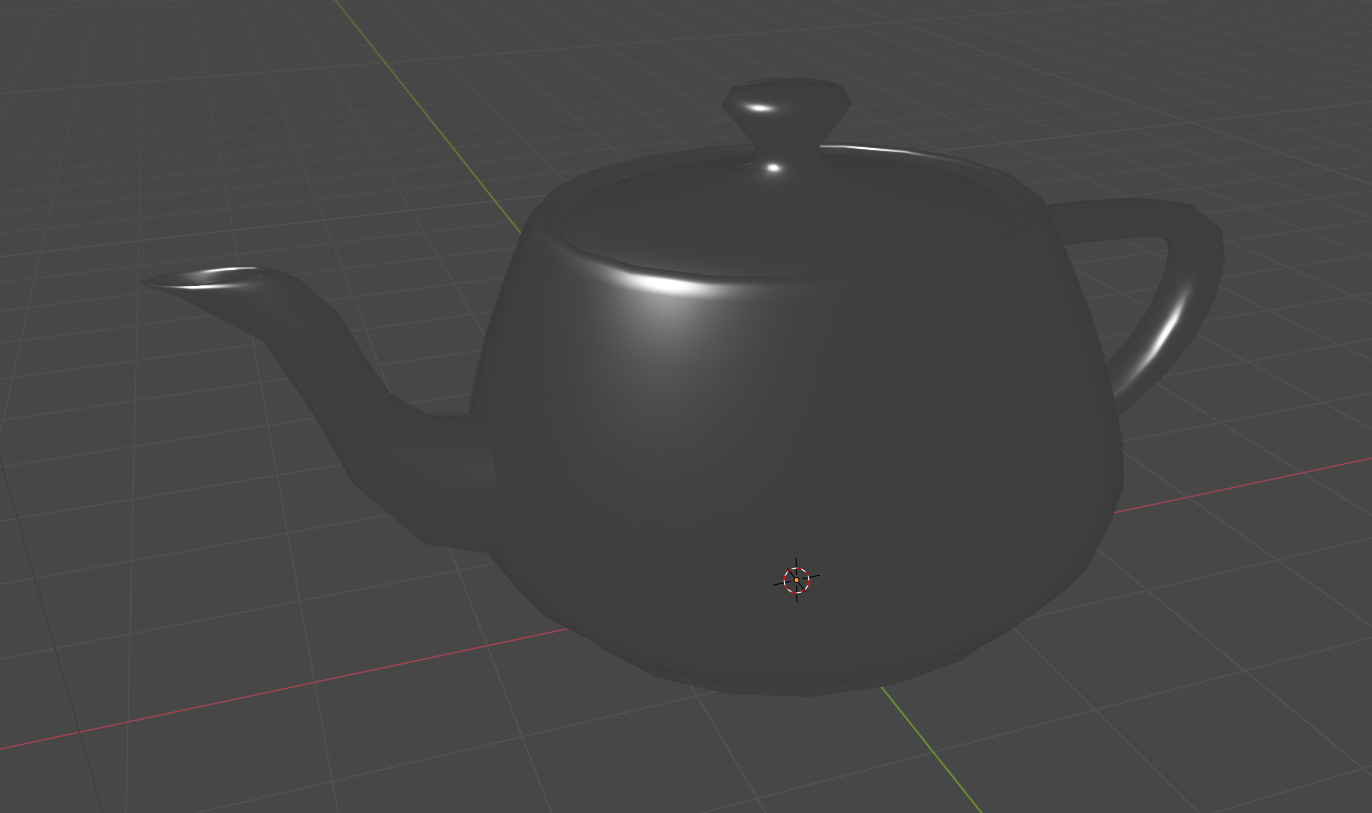
If we move the camera, the bright spots will also change, since we now see different parts of the light reflected at us. These highlights are what we call specular highlights. There are different models to approximate how much of this reflected light actually reaches our eyes, but the most common function used for this is Blinn-Phong, named after its inventors.
If we now combine the diffuse shading with the specular highlights, we actually obtain a believable teapot!
These are just the basic building blocks of rendering objects. You can do all kinds of tricks to stylize the rendering, or make it look more photo-real. Still, you can’t simulate physics exactly, and most of the effects you see in games are just faking things until they look good. To achieve the teapot above, instead of figuring out realistic formulas, I played with the parameters of the algorithms until it looked okay.
There is so much more to say on this subject, but hopefully this has given you a very basic understanding of how objects in games look like they are lit from some light source. There are many more ways to sell the illusion of 3D and realistic lighting, but those may have to be revisited in a future post. For now, if you have any questions, feel free to tag me on the RSBANDB Discord, and until next time!
Pricey Tech Gifts for the 2010 Holiday Season
posted by Mike on 22nd December 2010, at 5:49pm | No CommentsKeep Your Laptop Cool While Keeping Costs Low Pt 1
posted by Pfkninenines on 30th June 2010, at 1:10am | 1 CommentNext Page »
Tags
 Search