

When I saw the words “Grandmaster quest” on the main page, my heart was filled with excitement. Finally, we get to take on Lucien and bring on the next step through the storyline and potentially-
… wait, what? Nothing to do with While Guthix Sleeps? And … the quest is MEDIUM length? WHAAAT? What kind of Grandmaster Quest is this?
I was disappointed at this information, to say the least, but a quest is a quest. What interested me, though, is that it involves the custodian of the Soul Wars mini-game. He’s spending more time in his tent and it looking stranger than usual.
So, why not? Mahjarrat or not, Grandmaster spells “challenge”, so I decided to have at.
Quest Guide
Before you enter, grab a pickaxe, a few prayer potions, some of your best fighting gear, and the runes needed to hit an enemy with fire wave (if you’re on Lunars, get runes for Swap Spellbook if you have the level – otherwise, swap it back). Take some food too, but make sure you have at least 3 spaces free (5 is ideal).
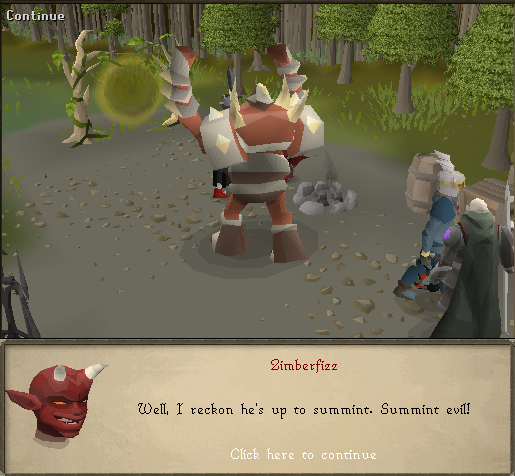
You start off by talking to, of all people, the imp Zimberfizz. Is it just me, or is Jagex incorporating the interactions of imps at an increasing rate? Talking implings, snow imps, camera-snapping imps, and now mini-game custodian imps. It’s like they’re trying to set themselves up as an intelligent race with equal rights as everyone else.
Buddy. I’d stop killing your comrades if one of you dropped a challenge scroll once in a while.
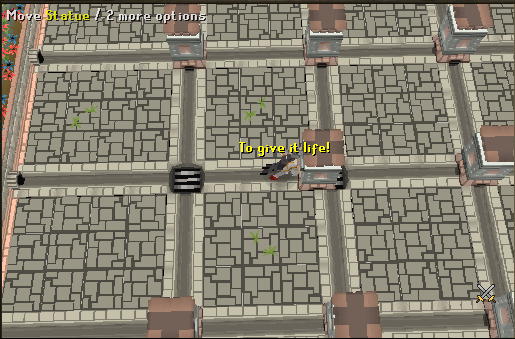
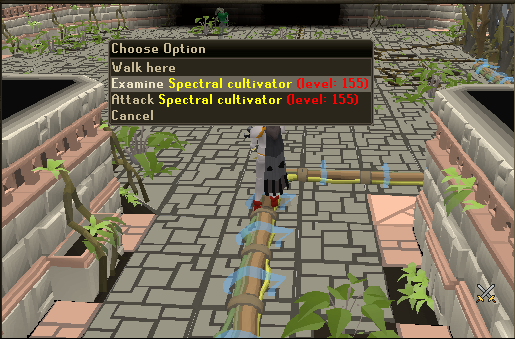
Anyways, chat with him, and he’ll say that Nomad’s been looking all strange. Indeed he has. The robed, hooded old man has suddenly become a bald, pale lookalike of Advance Wars’ Von Bolt. Except this guy’s anything but crippled. After talking with the partially intelligible imp, search the tent and you’ll find, of all things, a trap door. Delve in and watch the light show.
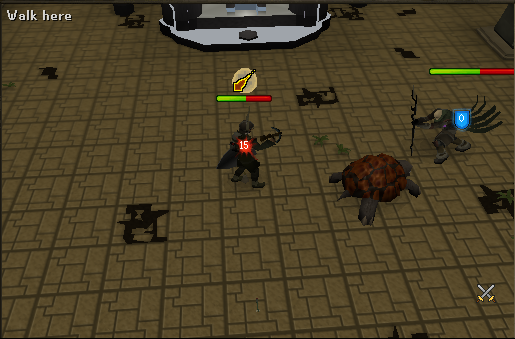
Bolt- sorry, Nomad will be running around a group of elite dark warriors, slaying them left and right with a few choice abilities. Keep every aspect of these in mind, because you’ll need to know them later.
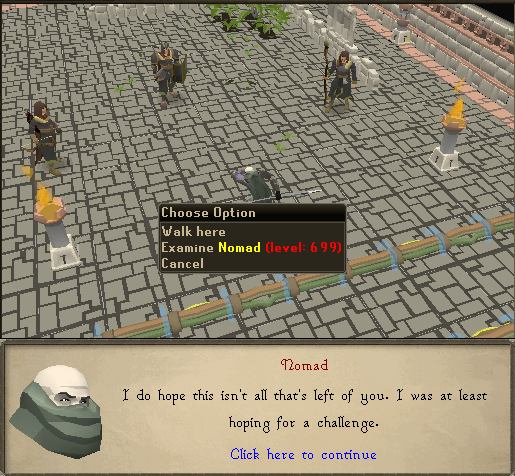
He will then run over to where you entered and you’ll have to talk to him. After witnessing his power like that, I’d suggest you not make him angry. The dude’s got a hitpoint bar longer than your height!
He’ll give you a chance to get away and not investigate, and then he’ll teleport away. Smart move, eh? Ignore his command and snoop around at your leisure.
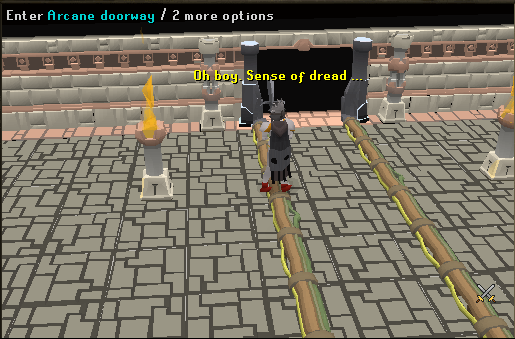
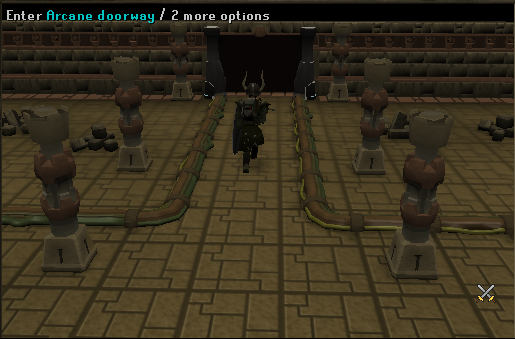
After careful examination of the almost unnecessarily large room, you’ll notice that the arcane doorway is powered by two sources coming from the nearby smaller doorways. From where you came in, go into the farther doorway.
A number of spiritual custodians are patrolling this room with a big giant machine. If you kill them, they’ll never spawn again even if you leave, so I recommend at least taking the ones out on the first floor. Do so at your leisure (if you’re a weaker player, advise you protect from melee), and then climb up to the second floor with the ladder at the other end.
More spirits. Again, kill at your leisure, but this one’s not as necessary. Eventually, head up to the third floor by climbing the ladder at the other end of this room.
Even more spirits. Don’t even bother with them, unless you like killing poor helpless souls. Instead, move the statue in the room over the grate to allow the water to pass and create a waterfall over the large slit near the ladder. You’re done up here. Climb back down.
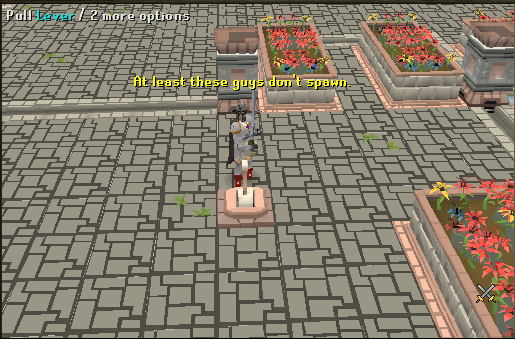
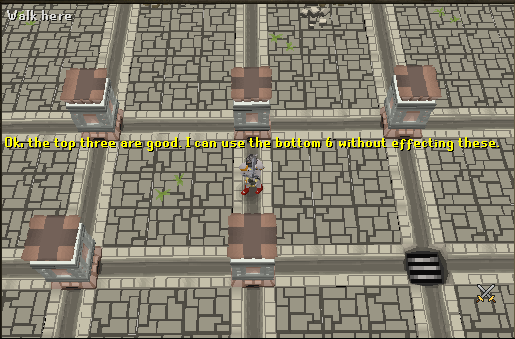
On the second floor, now notice that there’s two levers that control the statues this time. Pull the first one once, and the water will get directed to the next section.
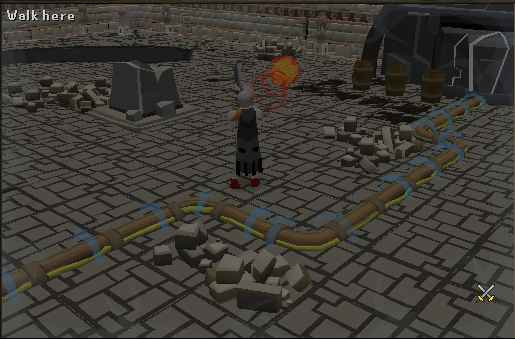
Now, there are two paths for the water. One leading to the next slit, and one to a pile of rubble. Use your pickaxe to mine the rubble, and send the water down the newly created hole by using the lever closest to it to redirect it there.
Now, climb down to the first floor, leave the room, and enter the other room with another machine.
In this room, there’s a machine, a couple of spirits, a couple of large fuel bins, and a gushing waterfall. Without second hesitation, slay those two spirits by any means necessary.
Now, stock yourself up with fuel and get ready to lure. If you’ve played as a defender in Barbarian Assault, you’ll know how to do this. Drop a piece of fuel, and an elemental will jump out to eat it. Make a trail (only have 2 fuel down at a time, or it may confuse itself [and you]), and lure it over to the waterfall by dropping some fuel right inside.
Once it gets there, KABOOM!
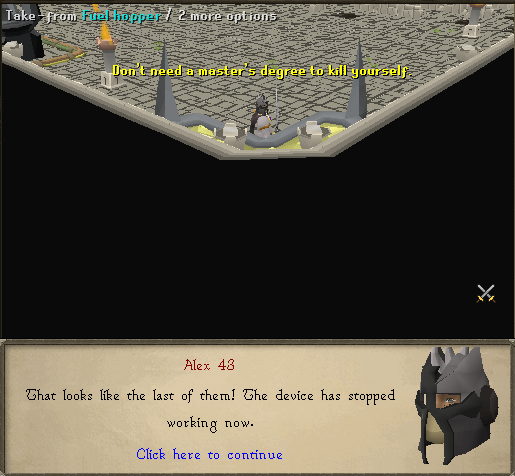
Do this two more times, and your screen will seizure. One down.
Now, head back to the second floor of the other room. Notice I wasn’t kidding when I said the spirits don’t respawn. On the second floor, rotate the statue until the water goes down the slit in the floor down to the first.
Follow it down there.
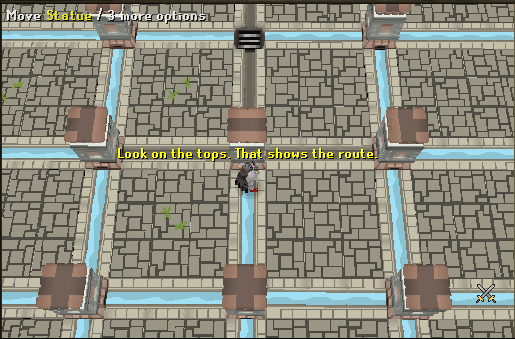
Now, it’s time for a puzzle. This is very similar to a 3×3 puzzle box, where you can only move statues towards the exposed grills. If you look carefully on the tops of the statues, you can see lines indicating how they direct water.
It looks hard at first, but if you’re good at puzzle boxes, it’s a cinch if you know how to plan ahead. Grab a pencil and paper, and sketch out a plan to get the water into all three slots of the machine. Here’s an example I did.
From there, focus on one row at a time. You can easily move pieces anywhere in a 2 x 3 space.
The only problem is that the statues take a little time to move, so you may need to steel up a little patience.
Once you have your plan, go ahead and do it.
And no, I’m not going to show you the steps. It’s a Grandmaster quest, you guys! What’s the point if I solve every puzzle for you? All it is is a carefully disguised 3×3 puzzle box. The easiest of the bunch! And I even posted one of “many” answers!
After you very quickly and fluidly get all three water slots filled, the machine will, for some reason, malfunction. Two down! Time to enter the doorway!
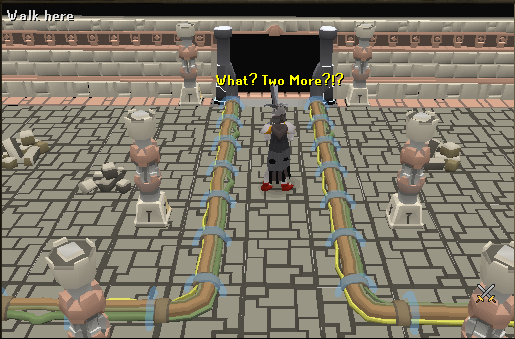
Now you’re in an EVEN BIGGER room! And, to your great surprise, there are TWO MORE machines blocking the door to what appears to be an isolated room. Man!
Again, unless you like tormenting souls, ignore them and proceed to either room. The order doesn’t matter.
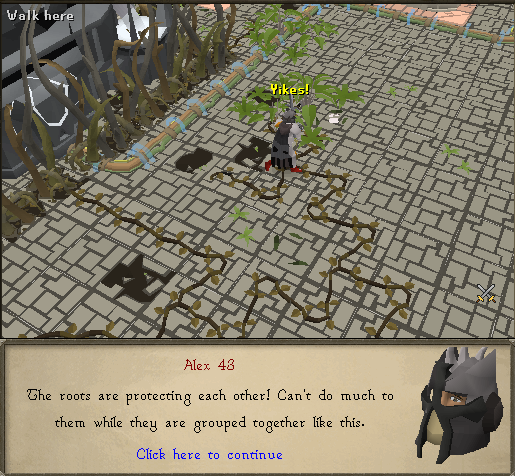
If you’ve entered the room on the left, you’ll be encountered with the machine surrounded by evil tree roots. And soul caretakers. You can’t do anything in this room, so follow the root and continue on towards the surrounding room.

Inside this almost unnecessarily massive room are four individual roots. Destroy all four, and the screen will shake.
Well, that was easy. Head back to the machine room. Hopefully destroying those roots will have caused the roots surrounding the machine to be-
HOLY!
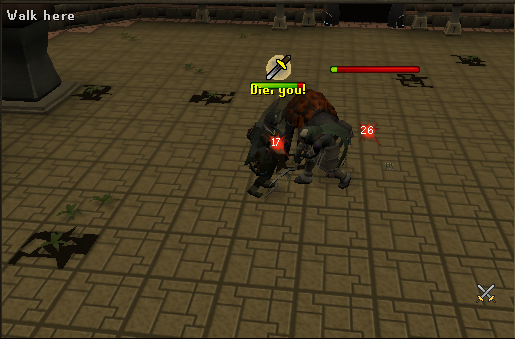
That’s right. A prototype Avatar of Creation. And he’s guarding that machine! Whip on Protect from Melee and take him down!
Now, I know what you’re asking. Yes, he’s got 1000 health. Yes, his defense is considerably high. And yes, that’s not all.
The key to fighting this guy is this: DON’T GET DISCOURAGED. After painstakingly bringing him down 250 health, he’ll eat a newly spawned root and fully recover.
Keep fighting. When you fatiguingly take him down 500 health, a root will spawn, he’ll eat it, and fully recover.
KEEP FIGHTING! After you suffer enough torment to wipe away a full 750 of his health, yet another root will spawn. He’ll eat it, and recover once again right back to 1000 health.
KEEP FIGHTING!!! No more roots will spawn. He’ll die this time! I promise!
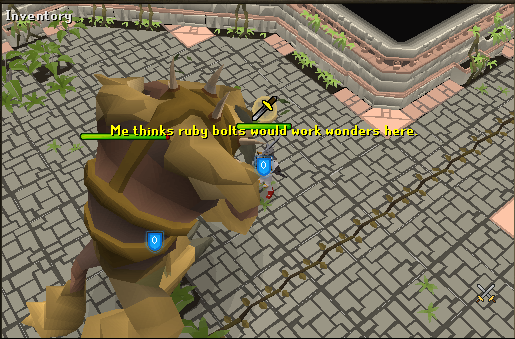
Here’s a tip. If you use ruby bolts (e), there are no restrictions to the health drained. If he’s full health and you score a special, he’ll take a whopping 200 damage! I’ll prove it.
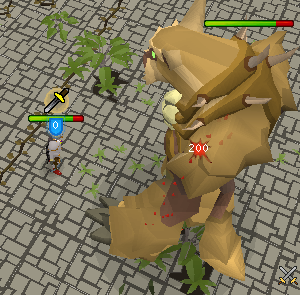
That’s 20% of his health right there! I’d advise you use that, because not only does it deal intense damage, but you can also safe-spot and therefore save your prayer.
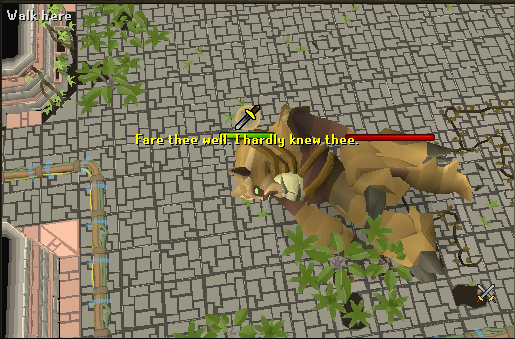
After casting the final blow, he’ll die along with the machine. Whew! Done with that room.
Now, you’re probably thinking that there’s also a prototype of the Avatar of Destruction too. If that’s the case, then …
… tense moment …
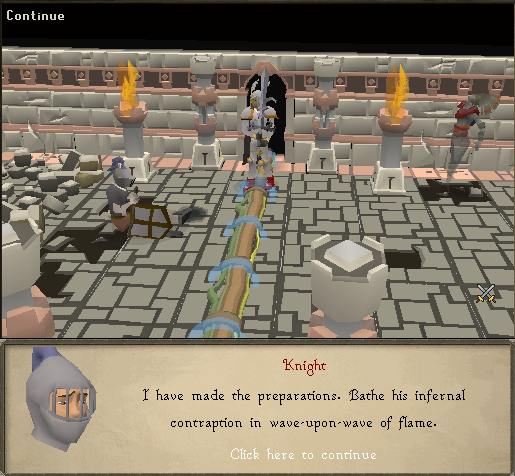
Then don’t. There’s no avatar of destruction. In fact, the other room is a breeze. Before you enter, you’ll be stopped by a coincidentally placed dying knight who will speak in a riddle. But, in a nutshell, all you need to know is “Cast wave upon wave of fire” and, upon searching the body, “Only the pious”.
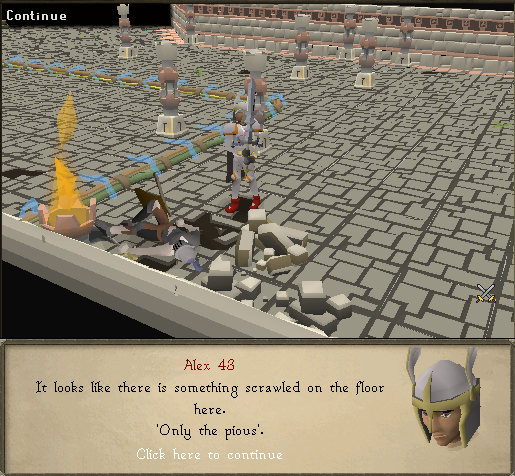
Go ahead and enter the room. Make sure you have 10 prayer points at least.
It’s a dark room, and you’re choking to death! The cure … no, not a facemask. Turn on the Piety prayer. Oh, but it drains my prayer so fast and I don’t have any potions left from that battle! What’ll I do?
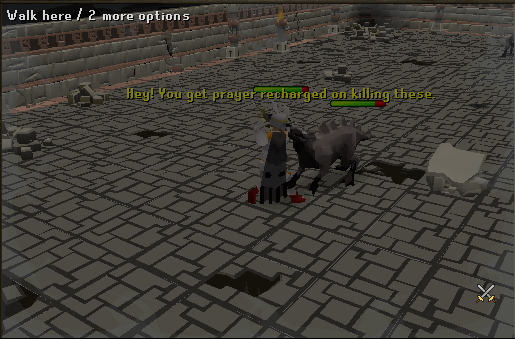
If you kill a creature, your prayer gets FULLY RESTORED! Do this sparingly, and salvage the room until you find yourself 5 stone slabs.
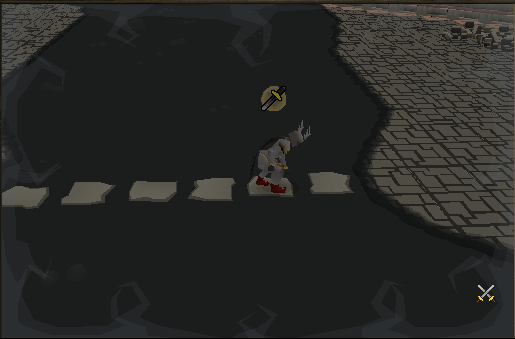
Now, in the middle of the room, find the started bridge across the … tarpit? Place the slabs in the tar and construct a bridge. Across is the dreaded machine, but to the left side, there’s a number of gunpowder barrels just temptingly sitting there. What’s more is that they’re classified as NPCs.
Cast your fire wave and get down.
KABOOM!
Machine’s out, and your way is clear! Huh! Some Grandmaster quest.
Now for the final tomb- sorry, room. Nomad’s probably inside. … ok, I’ll spoil it for you. He IS inside. You will need to prepare yourself for the final battle as best as you can.
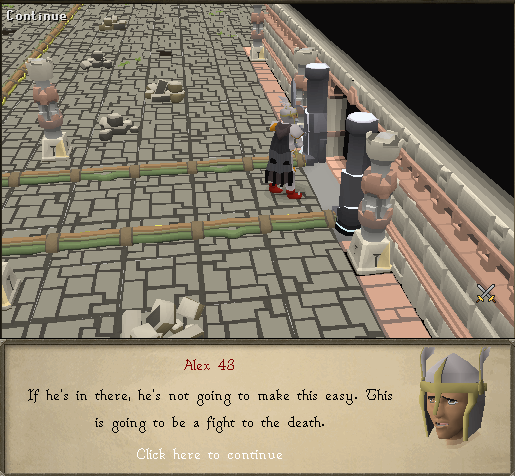
Actually, on second thought, don’t. I want you to witness him as he is. Make sure you’re not wearing any barrows or anything that gets ruined upon dropping, because unless you’re a fast runner, you ARE going to die after you enter.
And I want you to.
Enter the room.
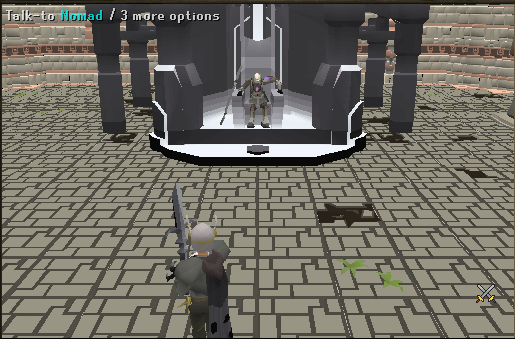
Final boss, getting all his immense power from a chair. That’s Von Bolt, all right. There’s an Advance Wars tribute right there. Sounds a lot cooler than Nomad, if you ask me.
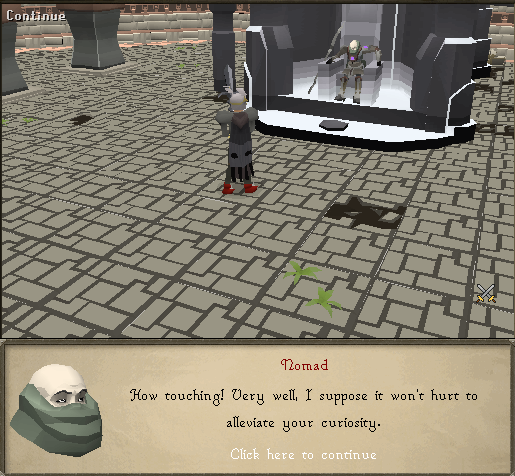
Have a chat with him, and he’ll ever so kindly explain everything. If you’re too lazy to decipher, I’ll summarize. He’s betrayed Lord Zamorak and is preparing for his return by beefing himself up to a state in which he can kick his hide and potentially take over instead.
Ah, but do you want to go under a God named “Nomad”? Me neither. Have at him! Do what you do best!
… run.
I mean it, run! Teleports don’t work! Get the HECK outta there! RUN!
That’s the boss. This is why it’s a Grandmaster Quest. That’s the ONLY reason that this is a Grandmaster quest. The final boss.
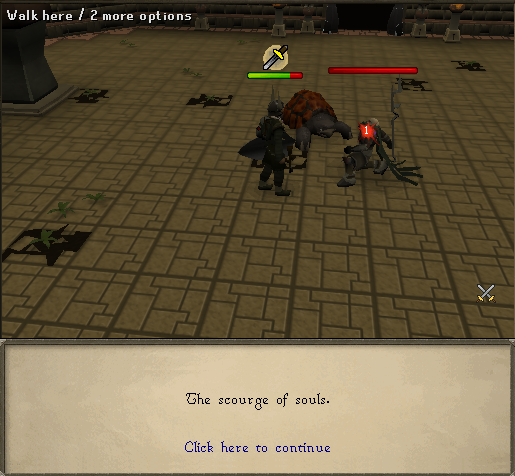
NOMAD – SCOURGER OF SOULS
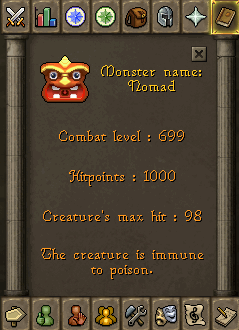
Health: 1000
Max Damage: 98
Immune to poison.
Attack types: Melee, Onmirange (apparently counts as ranged and magic, but either protection prayer will do nothing)
Details:
Unbelievably, this guy’s got 1000 health. I mean it! He doesn’t have any roots to heal himself with, but that’s not going to stop him from being Runescape’s hardest quest boss ever to exist!
Difficulty-wise, I’d say he’s about the same as taking on a Tormented Demon without using darklight or prayer whatsoever. You WILL get hurt. You WILL die.
Hiding behind the nearby pillars will stop his barrage and allow you to recover, but you have to be quick. If he gets bored of your hiding and teleports back to his throne (5 seconds of inactivity after he shouts “Face me!”), he heals. That’s right. If he teleports, he HEALS! If you’re incredibly skilled at safe-spotting, this may be a good tactic to use, but only sparingly.
It’s not just the fight that’s tough: this guy’s got special abilities. I took the liberty of making up names for them all.
LandMine:
“Let’s make this interesting!” – he will drop surrounding landmines that do 40 damage if you step on them. If you absolutely have to run somewhere (I pray you don’t), turn off auto-retaliate if you’re meleeing and “try” to take your time walking diagonally over them.
Power Blast:
“You cannot hide from my attacks!” – he will hit you with a very powerful magic attack, capable of doing 75 damage. Apparently you can dodge it by hiding behind a pillar, but with the mines most likely out, it’s usually never worth trying, since the combination of getting hit by a mine and this attack WILL kill you.
Illusion:
“Let’s see how well your senses serve you!” – he will teleport and split into 4 clones. They are weakened during this attack and only do about 5 damage, but since you’re being attacked by 4 at once, it can add up. Hit them with your weapon to make the three clones vanish. Hit the real one once to end this attack.
Final Smash:

“Let’s see how much suffering you can take!” – his master attack. He will deal damage equal to your hits level minus one. My hitpoints level is 98, so he’ll hit a 97 on me (or less if I don’t have max health, which will result in my immediate death). The only fortunate thing is that this attack takes a full 10 seconds to charge, so you have lots of time to get yourself fully healed. This attack is unavoidable, since he teleports you a distance and freezes you simultaneously before doing it. The only fortunate thing about this attack is that if you get your health full quickly and have a ranged weapon, you can most likely get 5 free hits in before he gets you. And after, he pauses for 5 seconds, which allows you to quickly heal yourself again before resuming. By what it’s worth, you’ll not waste any more food than normal combat with this attack if you have the ability to hit him during the charge.
Recovery:
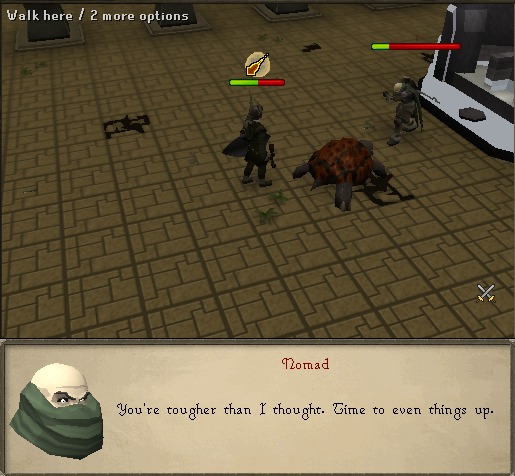
“You’re tougher than I thought. Time to even this out.” – he heals. Only about 250, though. He’ll only do this once, don’t worry.
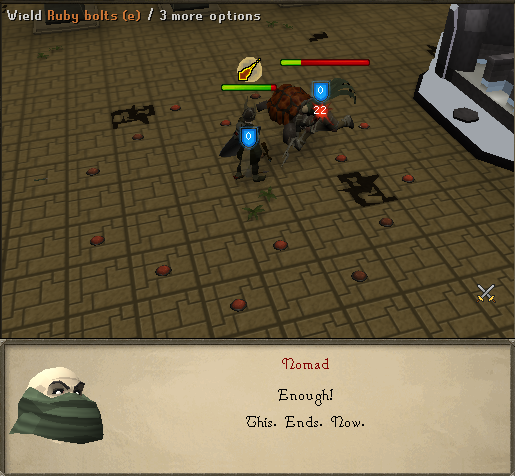
Last Stand:
“This. Ends. NOW!” – he goes berserk and all-out melees. His weapon becomes like the Saradomin God Wars commander, hitting about the same, too. Endure it with defensive prayers like piety.
He’ll only do these attacks if you bring him down a specific amount of health. Much like the Tormented Demons switching prayers.
Handicaps:
He’s got a number of handicaps against you.
– You can’t use a cannon.
– Don’t even bother with rings of recoil or vengeance, since they do not work.
– Ruby bolts do 75 damage max unlike the anticipated 200.
– He fully heals and restores himself if you hide from him for 5-7 seconds, or if you leave.
There is only one real handicap for you. If you die (and you will), then you will spawn at the Soul Wars bank, and your gravestone will appear in one of the graveyards for you to reclaim your stuff without a hassle at all. This means you can try as many times as you want without all that much risk. Just be careful using barrows.
Also, using protect from melee seems to half the damage he does to you, even if it’s ranged. It’s unconfirmed, but give it a try.
Tactics:
There are two main tactics – melee and ranged. Don’t even bother using magic, unless you can score full ahrims and a seers helmet and have enough runes to take down the Corporeal Beast with fire surge or ice barrage.
For both these tactics, maximum food amount possible. Rockfish or Saradomin brews. The choice is yours. Saradomin Brews are a recommendation, though.
Melee – whip on piety, chug a couple extreme potions, and hoard up on those rockfish.
His melee is beast, so get the best possible armor you can (tanking armor for Graardor, for example). Verac helmet, torag body and legs, etc.
Sacrifice as much strength as you can for defense if it’s well worth it.
Also pull out your best summon, be it a tough damage-dealer or a beast of burden. I would advise against a unicorn stallion, since Nomad deals lots of damage almost too quickly, and rather you use a titan or pack yak if possible. Nomad never attacks summons, so hold nothing back.
Ranged – Ruby and diamond enchanted bolts, just like fighting Kree’Arra. Since protection prayer doesn’t help, use those points to use your best ranging boost prayer.
A recommended tactic for players that don’t have very high summoning or prayer levels, since Nomad’s ranged attack isn’t as good as his melee.
Although ruby bolts only do 75 damage max, it’s still 75 damage. 7 of these hits will make him manageable enough to switch to diamond to finish the job.
Wear your best ranged armor. Black dragonhide is good, but if you can manage Karil top and bottom in and fit them in your three (or 4) best item list, all the better. You can’t poison him, so don’t even bother with emerald.
Cute Kid40’s strategy:
Upon slaying Nomad myself (and it was tough), another player appeared with the same result and a victory dance to boot. By the sounds of things, he had a comparatively easier time than anybody else. His strategy was far different from mine (for one, he meleed with an Armadyl Godsword and I ranged), and I’d just like to thank him for his analysis and information. If you want more tips, look him up on Youtube.
This is what he told me:
“During the fight, if you melee, have piety and melee protect on. If you range, do eagle eye, steel skin, and protect from melee. Protect from melee will half the damage he does to you, even if it’s ranged.
Once you start, run over to the pillars and lead him there. When he yells “Face me!”, you have 5 seconds to attack him before he disappears and heals fully. Keep on attacking him and running behind the pillar, making sure this doesn’t happen. This way, you hit him once and he hits you once to minimize damage done to you.
When he summons the mines, just keep attacking him without running. But when he charges for his 75 damage attack, run behind the pillar and if you make it, it won’t hit you. Use this time to pot up and boost your stats, then attack him.
Use a fast ranged weapon, like darts or knives, to take out the clones. Protect from ranged against them will stop any damage when he attacks during this. Once the clones all vanish, go back to protect from melee. His green attack from afar is effected by Protect from Ranged, but the blue one is Protect from Melee.
When he teleports and freezes you, pot yourself to full or above max health. After you’re hit, heal up and continue.
If you get him down to 1/4 health, he goes berserk. Make sure you have at least 4 brews and 2 restores left during this.”
As for me, my only advice is this. Again, you can die as much as you want, you won’t really lose anything since your gravestone appears a 10-second run away.
Go ahead and suicide-charge him a few times to get used to his tactics and techniques. Learn for yourself what works and what doesn’t, and whatever method you use that does the most damage without yourself healing, use it.
Make sure you have a good internet connection for 10-15 minutes, as that’s about as long as the battle will take (before you run out of health or he does, whichever comes first), because getting him down to a tick of health and losing connection is simply the worst.
Upon killing him, you’re immediately thrust into a cutscene. Don’t worry about your health or turning off prayers. Once he’s down, you’re safe.
And no, you don’t get to know what happens. Not from me, anyways. Grandmaster quest, you guys. Do it yourself! It’s just that much more worth it!
CONTINUING THE QUEST GUIDE!
After a chat, he’ll leap from his throne in a dramatic fashion, and the battle commences. He’s got a melee and ranged attack, and protection prayers do nothing, so instead use prayers to boost yourself as much as possible. You got piety – use it! Otherwise, eagle eye the whole way.
After a few bouts, he’ll use LandMine. After a few more, he’ll then use Power Blast, where he charges up. It’s basically a mini version of his Final Smash. You can avoid it if you get in cover, but if you’re in the open, then brace yourself. Make sure you have at least 75 health in case it does hit you.
If you manage to get him down to about 1/4 health, don’t celebrate yet. He’ll heal himself with his Recovery. This only happens once, though, and is meant to discourage you more than anything.
Once he’s down to about 1/5th health, then he enters Last Stand. He no longer will do any of these moves, and will resort to using nothing but melee. He attacks about as fast as throwing darts, though, so keep a close eye on your health. No more tactics – you gotta stay alive by whatever means necessary and kill him as fast as possible.
Once that’s done, watch the final cutscene (No! I will NOT tell you what happens after!), and you are DONE!
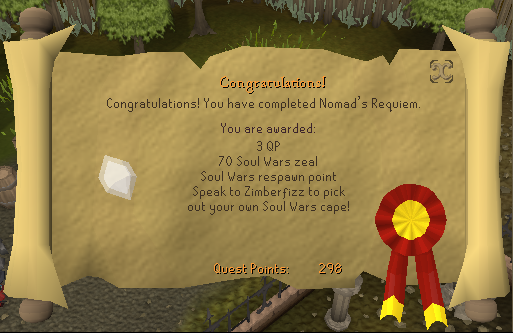
Your reward? Only Runescape’s best cape ever.
ALEX’S ANALYSIS
That was truly a GrandMaster battle. Throughout the entire fight, I was on the edge of my seat; anticipating, urging, shaking and praying.
Getting to him was a fun challenge too. Tough, somewhat mind-bending, but hardly frustrating. The puzzles were on the so-so level, which is all right for a tough quest.
Grandmaster, though, I kind of expected something that would’ve taken me at least an hour. After patrolling the area for about half, I got the general idea and the puzzle was immediately solved in my head. Fifteen minutes later, I was in the second part, which weren’t really puzzles at all, but simply a test of patience.
Sure, they were fun, but I was expecting better. “Intricate” is a funny word, isn’t it?
If anything was Grand Master, it was the boss enemies. Both of them. The mini-boss, though it only meleed and could be thwarted by prayers, still had 3500 health to mow through before it died. Awesome ranged experience (for me, anyways), but the real challenge was persistence and the will to keep going, especially after it fully heals at 1/4 health after already doing so twice. A mean, but fiendishly clever tactic. Thumbs up, Jagex.
Nomad, though, is the Grandmaster quest by himself. If you don’t have a flawless, well-prepared strategy, the relaxed calmness of a monk, and a good load of luck, you’re never gonna beat him. It was a fantastic boss battle. The scenery was awesome (big giant looming throne), the music was pretty good (nothing beats Temple Desecrated, though …), and the animation was, for a Runescape enemy, quite phenomenal.
I greatly enjoyed fighting that guy. I died about 7 times to him before actually beginning to try. I hope he gets a wallpaper or something, because he’s cool.
All in all, if I mark the puzzle part on an Advanced difficulty, it gets a full 10. But as part of a Grandmaster quest, I’ll give it 8 / 10. Graphics were great and all, but I just had to take a few marks off for lack of challenge. That, and the almost unnecessarily large rooms. A few more decorations here and there would’ve been nice for those larger areas to make them more roomy, because alone they seemed sort of bland.
The boss battle deserves my full 10 / 10. It was epic. It was tough. It was fair. It had me preparing like I had never done before. It was a true boss battle! I totally want to try soloing Graardor now. It’s probably no harder. I am now so much more confident in myself.
And, if I can make a suggestion, Jagex: leave the temple open after the quest is done so I can kill those prayer-healing creatures again. Or simply finish them all off.
Best of luck to you all!
Tags
 Search