

Tricks of the Trade: Mobilising Armies Part 1
posted by Tim on 27th July 2009, at 11:28pmJust to inform you. My last article was done before the update that made more games start at once. At that time only four people went into a game at once, now around three games start at once so there is less waiting to start playing.
My last article I did was a review of Mobilising Armies. It’s now been around 3 weeks since Mobilising Armies came out. Siege, Hoard and Rescue have now been unlocked and techniques to winning have now been mastered. This is just to help you learn how to play the game better. You do not need to follow this guide. Take little snippets of information given from this guide and add to it. I am going to be talking about Conflict and Siege in this article because they are my two favourite scenarios. First off is Conflict as it is the game most people have gotten experience if you have some experience with Mobilising armies.
When Mobilising armies came out. Only conflict was open, so this is the game that most people have experience in. The point of Conflict is to eliminate your enemies. At the beginning most peopled tried using the Death Dot technique (well, I did at least). I actually won a fair amount of games at that point until I started examining the map and learning techniques from other players I played against. Now there is no “perfect” set up for your squads. You want to have a good average of the each type of Squad. Now while you attack with squads, you can also attack with Special Units.
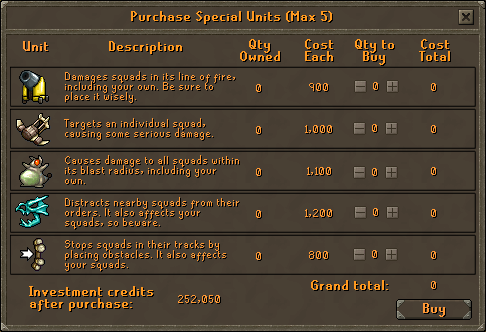 I’ve found out that two Gliders and three Chompas workout because a lot of times people will Death Dot their units an then you can use your Chompas to heavily damage all of their squads. The gliders are used then for taking out an enemies squad(s) and you need some backup. Or you think you might not be able to take down the enemy squad. Now time to talk about the different types of scenarios.
In Conflict, the Combat Triangle comes into play the most than any other game. Dwarfs are Melee, Goblins are Ranged and Elves are Magic. So, like in game, the Dwarves kill Goblins, Goblins kill Elves, and Elves kill Dwarves. Now while most of the time that will work, the best way to ensure that you will win is to go onto Special Terrain.
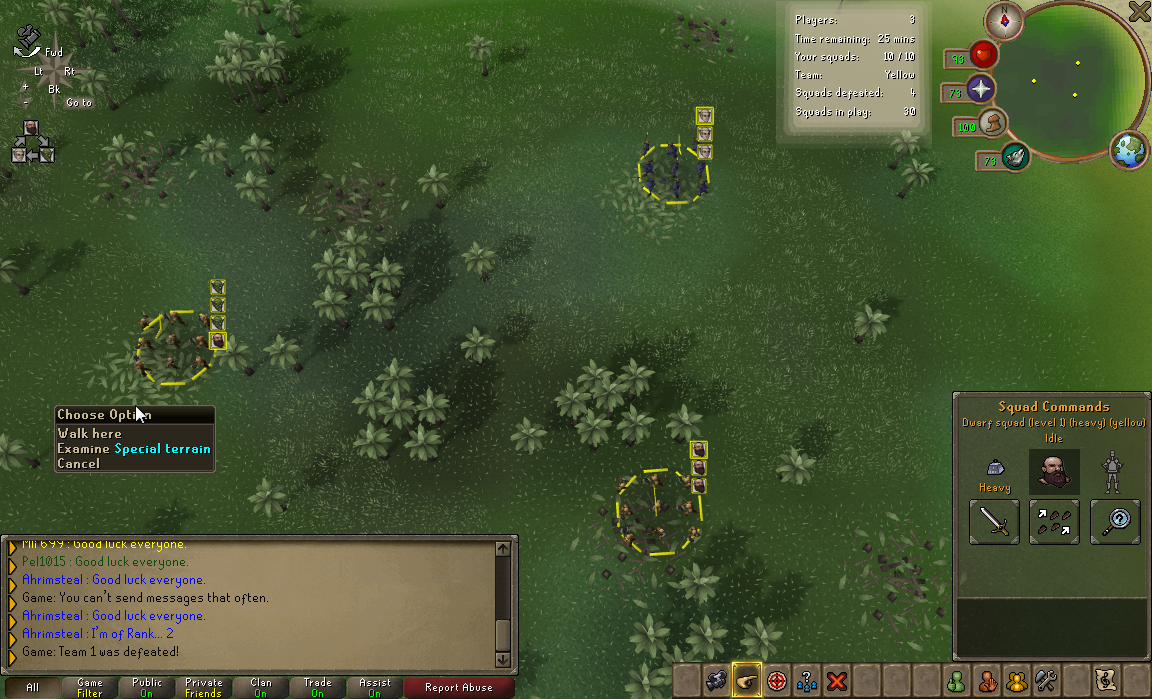 Special Terrain gives your squads an attack bonus so you basically do more damage than normal. I have tested this and with Special Terrain, A goblin, with the help of another squad, could take out a Dwarf quite easily. If you’re able to get you squads onto Special Terrain, you should be able to take down the enemy squad without losing much health. In the end, it can and will save you some credit that you would need to spend on resuppling your squads that died in battle.
Other than using special terrain, the Combat Triangle, and Special Units, that’s all Conflict needs. Siege, however, needs more and requires more concentration in order to win. As well as hoping that no one comes and attacks you while setting up and attacking the castle.
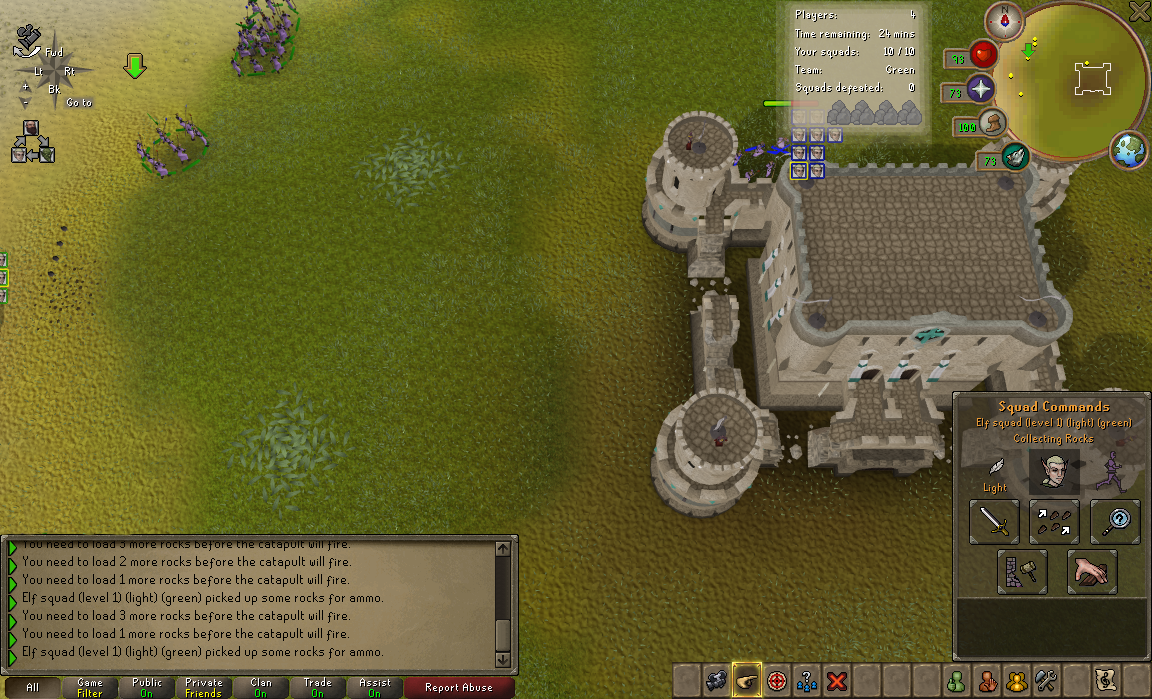
In Siege, your going to want ten Light units (can be any kind, I like to use Elves but that’s just me). The light units are used for collecting the Catapult Parts and then the Catapult Ammunition. Siege you don’t work together, you want to break into your side of the castle. You can either use a catapult or attack with your squads. If you don’t lag a lot then building a catapult will be your best bet of winning (seeing I have not lost a Siege game making a Catapult). As soon as you get in game, take four units (two in each direction) and find the catapult. If you’re on the North or South side of the map, the parts will be to the east and the west, East or West, parts are North and South. Once you have assembled the Catapult, you’re ready to get the ammunition.
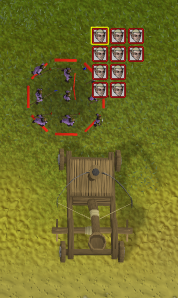
Rocks are used as ammunition for the Catapult. You need 4 rocks to have the catapult send 4 rocks towards your side of the castle so you can start to take it down. There should be two rock piles by where you start. While four of your squads are getting the catapult materials, send the rest of your squads to get the ammunition so you can send a show towards the wall right away. After you get the catapult up it’s just sending your squads to the rock piles to get more ammunition. The special untis you are going to want to get are five Chompas. Depending on what your enemies do, you might be able to damage a large amount of squads at once. That’s really all Siege is. Now I have never attacked the wall but I don’t know how it works. You’re going to want any type of heavy squads and send them to attack the wall. There are Infernal Magi at the four corners of the castle that send a magic attack towards your units, hurting them as they attack. This is very inefficient and I rarely see people do that, because the catapult will always beat them out, if the play knows how to always have ammunition flying towards the wall.
 There is nothing really more to talk about. Hoard and Rescue are going to be talked about in my next Trick of the Trades for Mobilising armies. It’s just too much to go through right away. Right now Siege and Conflict and the easiest ways to get ranks up. With this information I hope you are able to get your rank up high. This is all I have to say. Tim out.
2 Comments
 Search
6th August 2009, at 9:42am
Thanks, best info on special terrians so far!
6th August 2009, at 9:59am
Oh, one thing, is it easier to view special terrian spots in high detail? It looks as if those leaf patches are all special terrian… Just wondering, but I can’t use HD (only 8mb onboard graphics lmao)