

How To Install And Use VirtualBox
posted by Pfkninenines on 24th February 2009, at 6:57pmHistory and Features
If you have been following my previous articles, you have probably seen the mention of virtual machine software known as VirtualBox quite a bit. A virtual machine is a product that can effectively simulate a set of hardware that an additional operating system can utilize, all while you are still using your existing hardware through your traditional method. They are useful for testing software on non-native operating systems to your main computer, without needing extra hardware, as well as general experimentation, and security testing.
Several different software companies have their own versions of creating and utilizing virtual machines, and many of them are free. Microsoft has Virtual PC 2004 / 2007, VMware has their popular versions of software (including one free version across all platforms), and my VM of choice, Sun’s VirtualBox. Sun purchased the VirtualBox project from innotek, and has been developing it since February 2008. It is currently released under the GNU GPL for individuals and other non-cooperate environments, and is available for licensing in a cooperate environment.
VirtualBox currently (officially) supports Microsoft Windows, Linux, Solaris, BSD, and OS/2. Each of these is subdivided into separate operating systems, helping you pick the minimum or recommended settings for each choice. Though the previously listed are ‘supported’, you do not need to have your operating system listed for it to be emulated in the virtual machine. As long as you can give your VM normal virtualized hardware requirements, it will most likely run as if it were being used on an equivalent PC.
Notable features that VirtualBox includes are the ability to emulate 64-bit environments in 32-bit based hosts, as well as the ability to utilize video memory from the host system. VirtualBox has the ability to boot from a floppy (emulated via an .img, or host device), CD/DVD (emulated via .iso, or host device), network device, or virtual disk Hard Drives (.vmdk, .vdi, or .vhd). VirtualBox also has the ability to share USB and other host-based hardware with an emulated environment.
Installation
In the following, I will be explaining how to install and use VirtualBox in a Windows based environment, to create and set up a Windows based virtual machine. If you would prefer to see the installation of a Linux based operating system through the use of VirtualBox, please refer to my guide on installing and using an Ubuntu based distribution while using Unetbootin.
1 – Download the VirtualBox setup file for your desired host operating system from the VirtualBox site.
2 – Install VirtualBox with your desired settings, remembering to not install the Yahoo Toolbar, unless that is something you would also enjoy having.
3 – For this guide, I will be installing Windows XP. When you’re on the VirtualBox main page, click on the ‘New’ icon. You will be brought to the New Virtual Machine Wizard.
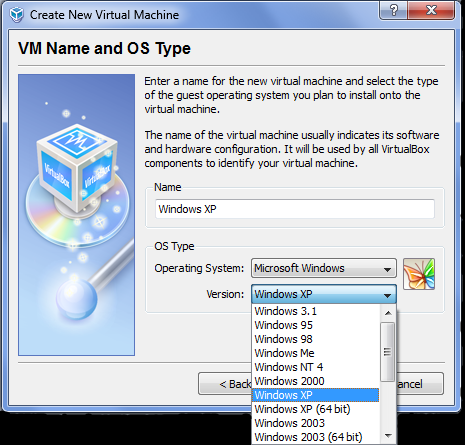
4 – Enter a name, and select the operating system of Microsoft Windows and Windows XP (standard selection is 32-bit). This merely suggests RAM and other minimum requirements. You do not need to select this, but it is easy to do so.
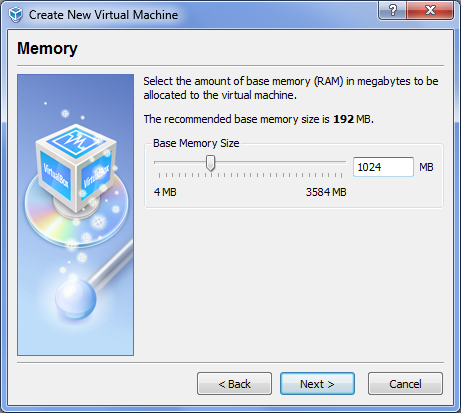
5 – Select your Base Memory Size. This will be the amount of RAM that will be dedicated to the virtual machine while you have it running. Though the base is 192MB, I chose to dedicate 1GB (1024MB) to the machine.
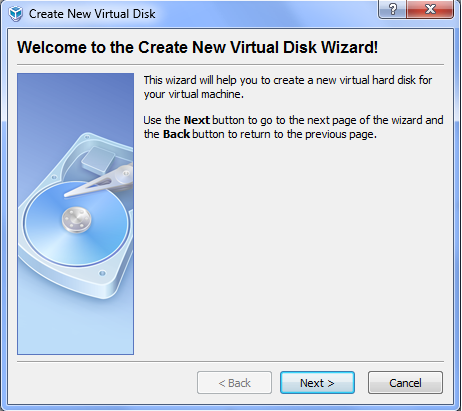
6 – At this point, you will need to either create a new Virtual Disk, or use a pre existing one. Since I wish to install Windows XP, I chose to create a new disk.
7 – You can choose either a Dynamically Expanding disk, or a Fixed-Size disk. A fixed-size image will dedicate whatever size of the disk you choose to the virtual machine. It will create a .vhd that is always the size you specified. A Dynamically Expanding image will not dedicate the space before hand, and will allow the image to expand physically on your hard drive as you add more items to your virtual machine. I normally choose this option due to me wanting to save physical hard drive space.

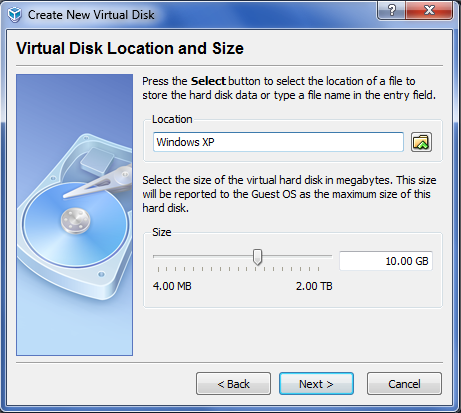
8 – Specify the name and location you wish to give your virtual hard drive (.vhd image) and also specify the size. Remember, if you chose a Dynamic image, you do not need to have the full allotted size when you save.
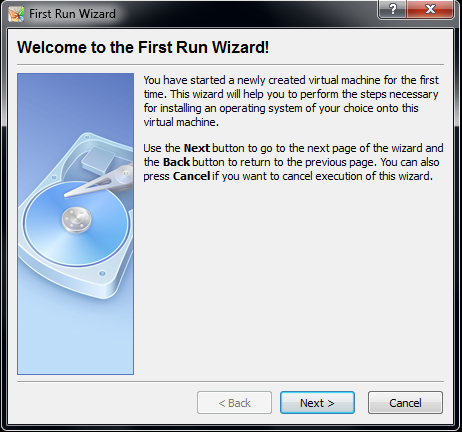
9 – With newer versions of VirtualBox, you no longer need to specify your .iso or CD/DVD before initial boot, so that is what I am doing at this point. Simply select your newly created VM, and hit the Start button. You will be prompted with the First Run Wizard.
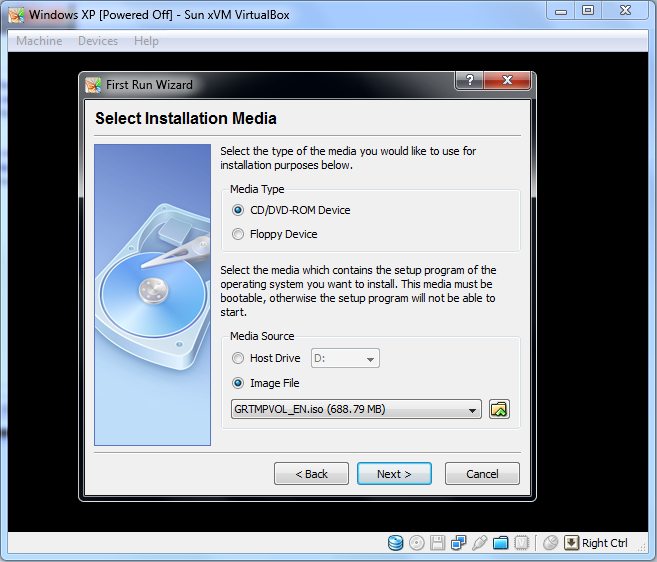
10 – Select either your physical CD/DVD device, if you have a physical CD/DVD that you are using, or select your image file from a hard drive as I have done in this guide.
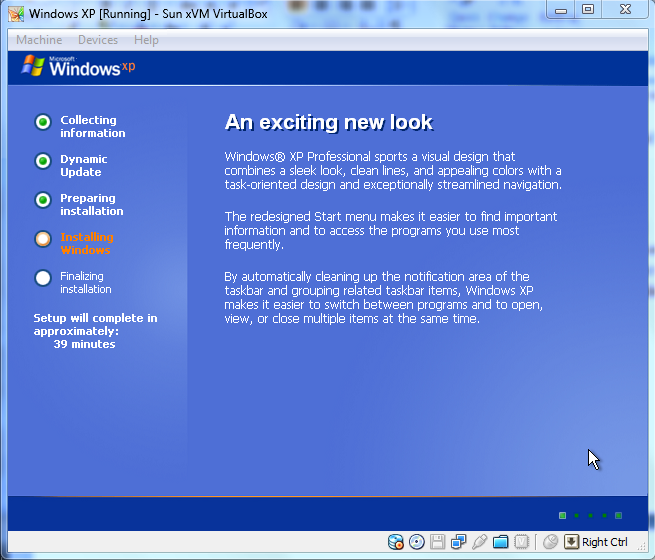
11 – You may wish to change settings, but the defaults should work fine. After selecting your image, your machine will boot up the CD/DVD. You will see the traditional Windows partition/installation screen. Select your preferences, and install.

12 – After selecting your preferences, Windows XP will begin to install.
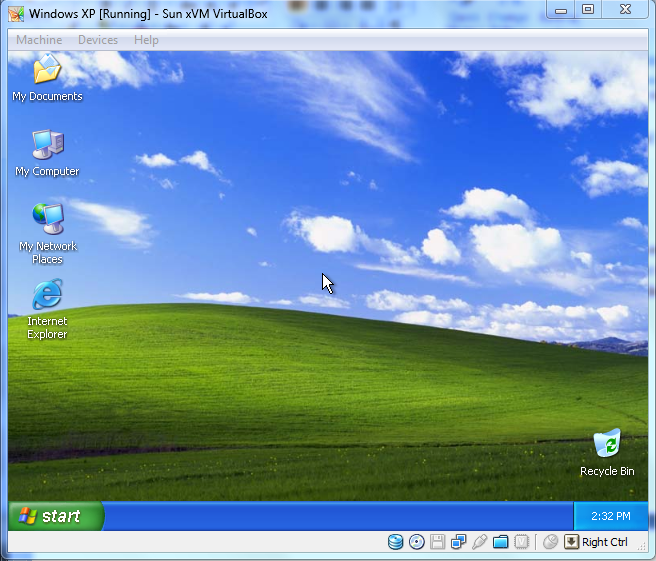
13 – After installation, you will be presented with a small desktop. With newer versions of VirtualBox, basic graphics functionality will have been installed, allowing you to change the size of the screen without further customization. You may stop here and install updates, and whatever else you may need to, or you can follow the next few steps to enable a useful feature to adjust the size of the screen on the fly, as well as enabling the ability to full-screen the Virtual Machine so that it looks like it is your host operating system.
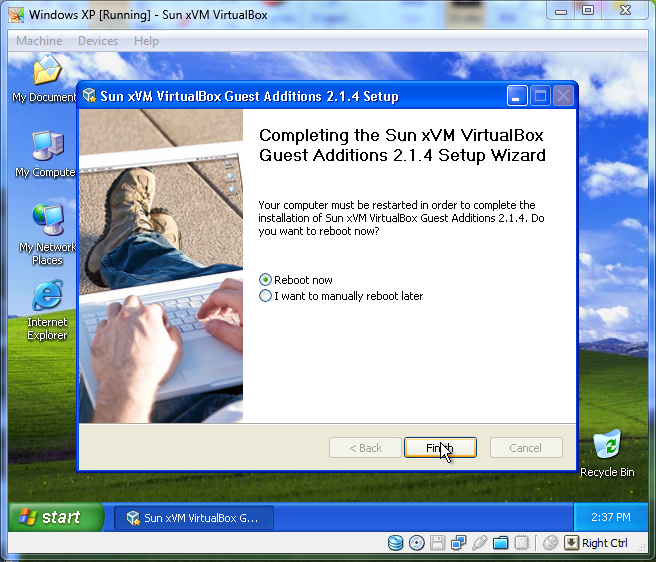
14 – To move your cursor out of the VirtualBox virtual machine, press your right control key. You will then be able to move your host mouse cursor, so select the Devices tab at the top of the window. Scroll down to ‘Install Guest Additions’, and click.
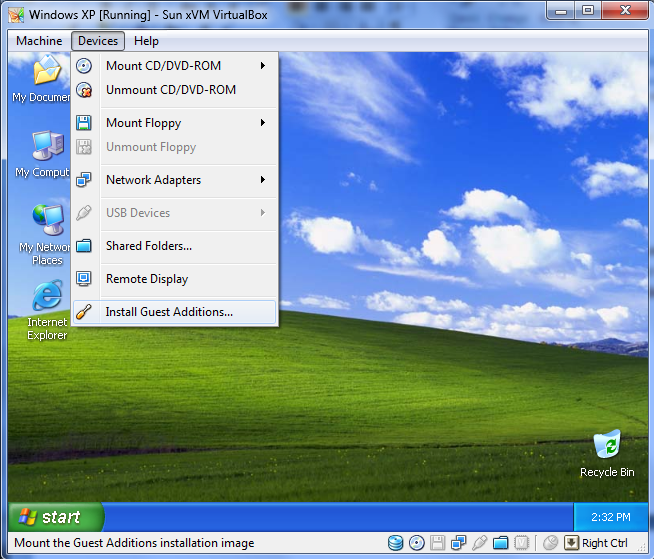
15 – Follow through the set up if it is automatic, or go to My Computer, and select the newly mounted CD drive + CD. Reboot the Virtual Machine. You will now be able to move your cursor in and out of the Virtual Machine without need for the right control key.
By adding the Guest Additions, you also have the ability to move to Seamless and Full Screen modes. Seamless will appear is if you have two task bars in Windows, or in general, a Windows XP task bar at the bottom of your screen in other operating systems. Full Screen mode will totally maximize your Virtual Machine window so that it has the same dimensions of your current screen size. Ex – If your host screen dimensions are set at 1440×900, the Virtual Machine will conform to that size, removing any trace of your host operating system.
If you are planning on gaming using this set up, don’t expect much. Though VirtualBox is capable of emulating a graphics card, or partially using your host’s card, the process isn’t that efficient. I am able to run HD RuneScape in my Virtual Machine, but it is a bit laggy. Don’t expect much performance; this is generally for testing and experimentation purposes.
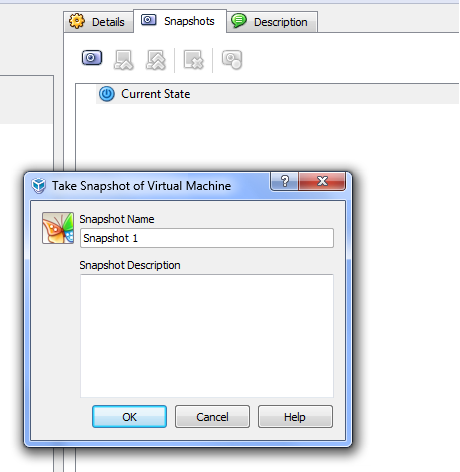
If you need to do testing, for example checking an .exe for viruses/adware that are immediate in effect, you can do this quite easily in the Virtual Machine. Create a Snapshot of the current working state, and you will be able to revert to that point at any time, without any changes have been made to your system, virtual or not. The ability to create Snapshots could also be useful if you decide to practice on a Virtual Machine before trying something on your host machine. You could want to practice with a partition editor, but without causing any harm to your physical machine, you can check the effects in your Virtual Machine, and revert to an old Snapshot if something goes wrong. The same would work for checking how well an upgrade process would work if you chose to upgrade from XP to Vista, using the upgrade utility.
I hope you enjoyed this article, and other articles I have written. If you have any suggestions for future articles, please feel free to PM me on the forums, or post in the comments.
6 Comments
 Search
25th February 2009, at 3:55pm
aew
25th February 2009, at 3:55pm
bele meu nome e diego
23rd November 2009, at 3:32am
found this very useful and basic.thanks
27th April 2010, at 1:35pm
Lovely blog, really cool.
10th June 2010, at 7:07pm
VirtualBox worked great for me. I installed Windows Server 2003 as a guest OS on my Vista system, but when I try to start Win Serv 2003 via the CTRL+ALT+DEL sequence, I always get the Task Manager for my Vista OS. How do I overcome this problem? Thanks!
14th June 2010, at 10:04am
press the rt/ctrl key only that will allow you to click outide the VM box. In the upper left corner menu you should be able to emulate the click with an option in the dropdown box