

Ubuntu Linux
posted by Matthew on 31st January 2007, at 11:34pmThis is a guide I have made describing how to Install and use Ubuntu Linux on your computer system, in a dual-boot setup, that will allow you to use Windows too.
About Ubuntu
Ubuntu Linux is an alternative to Windows – a fully-featured operating system that will allow you to connect to the web, write documents, make graphics, and many other things. The main upside of many variants of Linux is the fact that they are absolutely free, open source, and have an open community for support. The whole Linux and open source philosophy is built around others being able to see the code, inspect it, and improve it, and it’s a model that has made many large projects like Firefox and OpenOffice.
What is Linux?
Linux itself is actually only the core of the operating system – called the kernel. A Linux distribution (often shortened to distro) is a larger project which will use many other features and programs to make a complete Operating System like Windows or Mac OS X. Ubuntu is one of the most popular of distributions, for its ease of use and good driver support, which are some of the more common downfalls of other distros.
So why Linux?
There are some people who like freedom. The freedom to view source code, modify it, and inspect it. There are some people who don’t like their software vendor putting a key into one of the core security APIs that will allow the US National Security Agency (NSA) to view all their documents, files, or probably take over their computer (yes, Microsoft have done this.)
There are some people who like stuff to be free. Ubuntu Linux is free, no cost at all. Windows often costs upwards of £100, and is in no way free.
There are some people who like speed. Linux is fast and efficient, and is always growing faster and more efficient as time goes by. And Linux also doesn’t leave the old computer behind. You try running windows Vista on a computer thats just three years old and you’ll probably have a very tough time. Try running Ubuntu on a computer thats five or six years old and it will still go like a breeze.
There are some people who like security. Windows is in no way secure in its natural state – you need a firewall and an antivirus to run it without having your computer screwed over, and even then you might do.
These are just some of the reasons people choose Linux over Windows. For most users, everything that can be done on Windows can be done on Linux just as easily, and free as well.
Installation
To install Ubuntu Linux on your hard drive, first you’ll need a large chunk of free space. Make sure this is available before starting, or you could face problems not only with it in the future, but also with any other Operating Systems you have on your computer. I would recommend you have between 8 and 12GB for Ubuntu. Also, make sure you defragment your hard drive before installation. Try and make sure your chunk is empty. This can be seen in the defragger, like this:

Note that if there is not a large chunk of free space, the installation process will fail at the partitioner (mentioned later).
If the computer you are using is not yours, please get permission first. The bootloader will be overwritten during installation, which will mean every time you want to boot into Windows instead of Ubuntu, you’ll have to select it. You won’t be able to just press the ‘on’ button, go off and make a sandwich and come back two minutes later expecting to see the blue login screen of Windows XP – you’ll have to be concentrating during boot-up and select to use XP. If anyone else uses the computer, you must tell them this.
Right now I would recommend backing up all your data to an external hard drive or DVD or something. Installing a new operating system can damage certain things.
The next thing you’ll need, which is rather important, is a CD burner, a blank CD, and a program that is capable of burning an ISO file onto that CD. Nero is bundled with many new computers, as is NTI CD maker, which I will be using.
First, you’ll need to download the Ubuntu ISO file from the Ubuntu website here. – Go to the section marked Ubuntu 6.10, and download from an area near you.
Once downloaded, you’ll need to burn the ISO file to CD. This is not just putting the file on the CD, you have to use an ISO burner. Within NTI CD maker, just select a data CD from the main menu screen, then go file->create disc from ISO disc image, select the Ubuntu ISO file you just downloaded, and burn it to a blank CD. Within other burners, it’s relatively similar.
Leave the disc in your CD tray or drive, and shut down Windows.
When then the computer reboots, some odd text may appear to begin with, and then the Ubuntu logo will appear. Ubuntu is designed to run as a Live CD, and it is actually possible to use the operating system while you are installing it! Once Ubuntu has started up, you should see a screen something like this (click on the image to see a larger view):

If nothing has appeared, hold down the power button, and restart in safe graphics mode.
Double-click on the Install icon.
First, you’ll need to select your language. It will most probably be English, which is selected by default.
Next, select your time zone by location. This is quite simple, just click on the little yellow dot that corresponds to the nearest city or whatever.
Next, select your keyboard layout. For most of you it will either be US English, or UK English. Only select one of the others, like Dvorak, if you’re absolutely sure you use it.
Now fill in your details. Make sure you remember the password you entered, as this will serve not only as a password for you, but for ‘root’, or Administrator for the entire system.
The next thing that will appear is a question asking where you want Ubuntu installed to. Click ‘manually edit partition table’. The partitioner should start, and you will see a diagram of your hard drive, something like this:

We are going to make a new logical partition with the two necessary partitions inside it. To start with, select the partition that occupies the space at the far right end of the hard drive. Right click it and select resize, then in the box that says ‘free space after’, type the number of MB you would like for the Ubuntu installation. I am using 10GB, which is 10240MB.
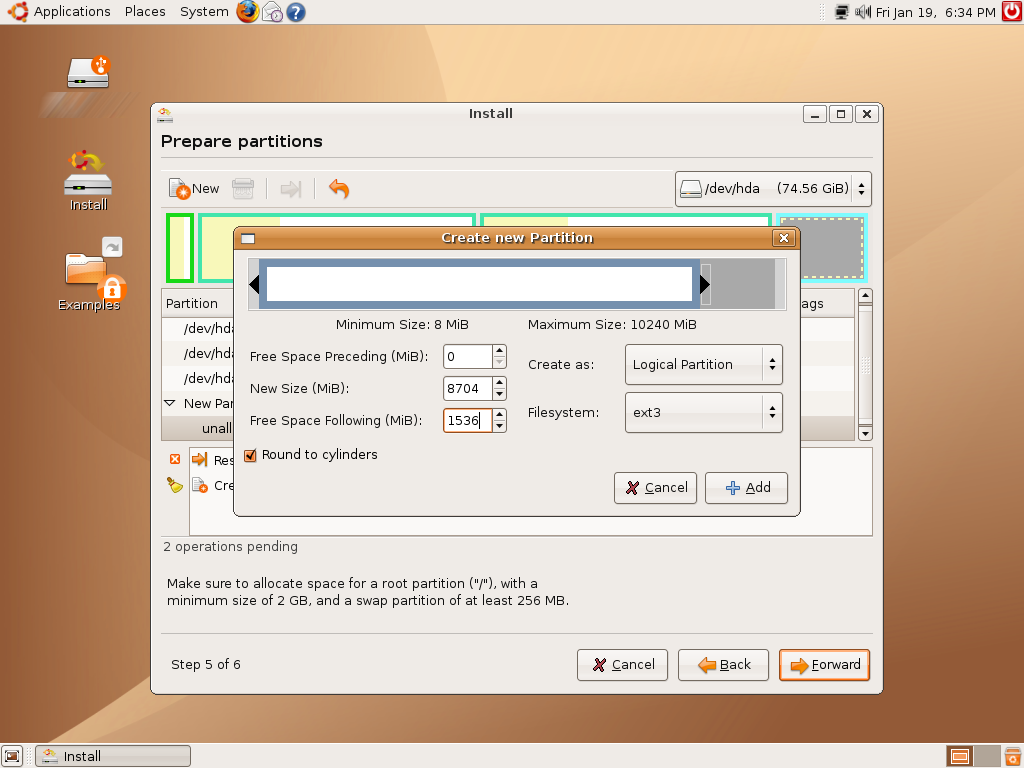
A chunk of free space should appear at the end of the hard drive. Right click on this free space, select new, and select to create this as a Logical Partition in the top drop-down box. It should now look like this:
![]()
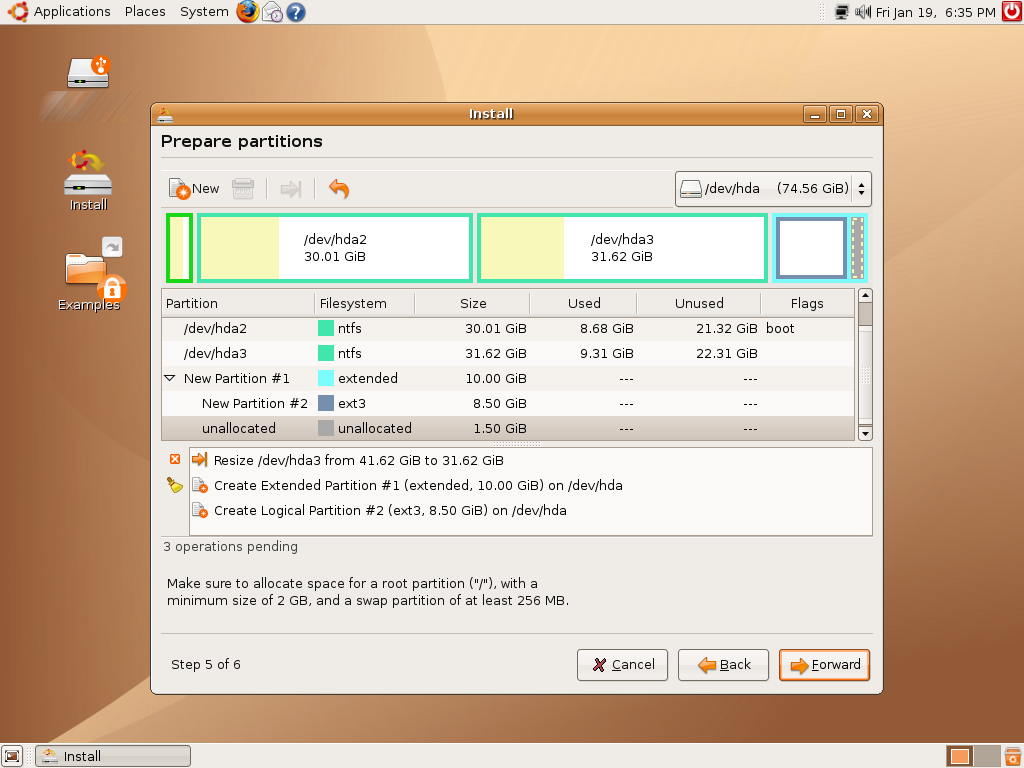
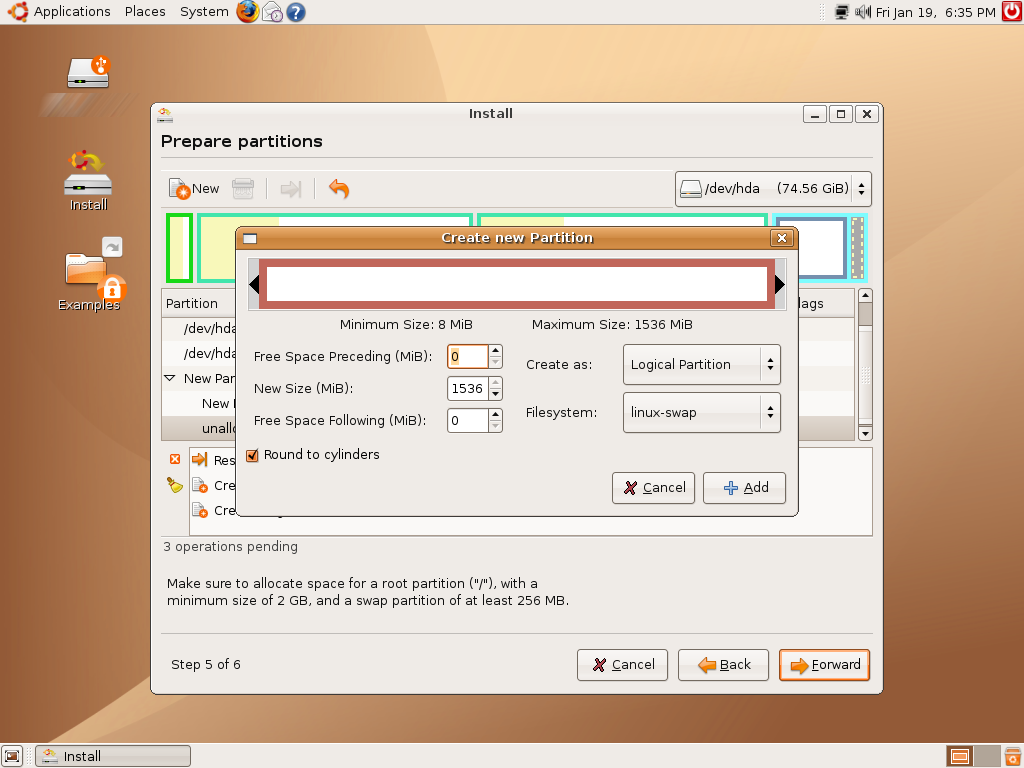
You should now have a chunk of free space surrounded by a bluey-green line. Right click on this, and select new. Within this space, you need to make two partitions. The first is the main filesystem, where all your files and stuff will be held, the second is swap, which is virtual memory. The first partition must be made in the ext3 format, and the second must be made in the swap filesystem. As for the sizes, the swap partition should be around the same size or larger than the size of your RAM. I have 1280MB of RAM, so my swap partition is going to be 1536MB, which is 1.5GB. It’s entirely up to you how large your swap partition is, though.
–

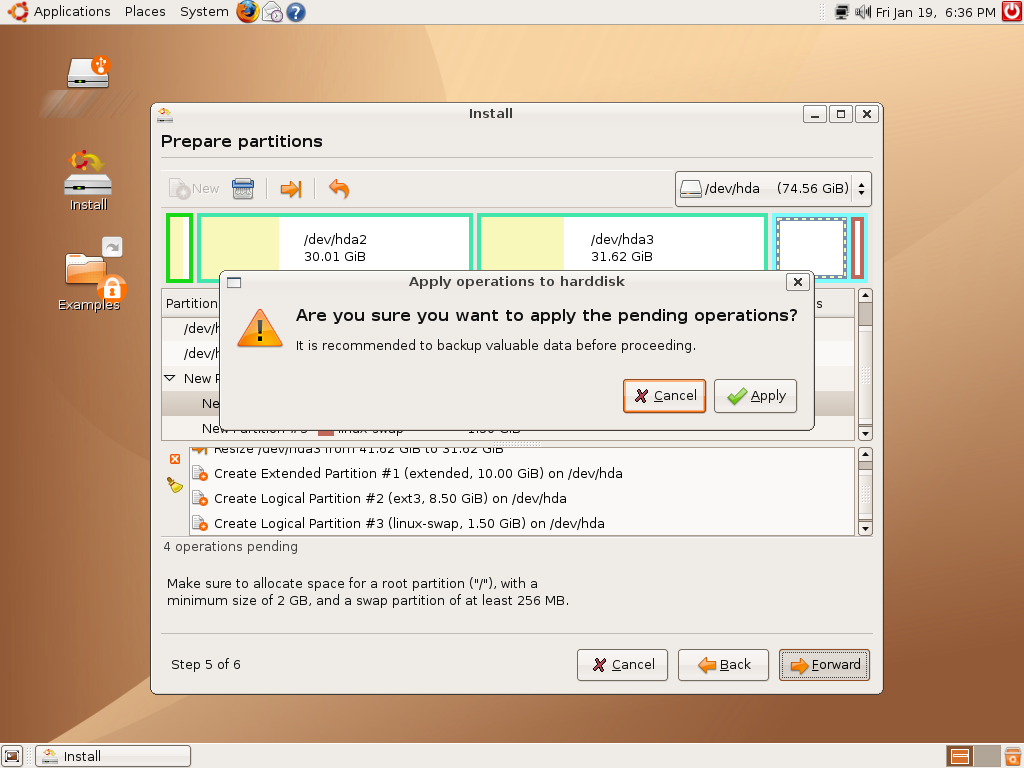
Once you have something that looks like this, click Apply. The partitioner should whir away and apply the changes. If you did not have a large chunk of free space in the kind of area you want to install when you defragmented, the partitioner will fail. If it does fail, do not continue your installation – click cancel, and get yourself a bigger hard drive or something.
Now, another screen should appear. There will be a few drop down boxes, and some stuff about media/hda1 and stuff like that. Make sure that only two partitions will be formatted, and that those two partitions are labeled / and swap. These two should also be the last two partitions on your hard drive. For me, they are 5 and 6:

Now, click next. Another screen should appear with the details of your installation. Make sure GRUB is going to be installed on hd0, and make sure only the two correct partitions are going to be formatted, then click Install.
A small window should appear with the progress of the install. While it’s doing this, you can technically use some of the OS, although if you don’t use it, the installation will go faster.
Once the installation is complete, a window will appear asking if you want to reboot now. Click reboot. Once Ubuntu has shut down, it will say something about pressing Enter. Take the CD out of the tray or drive, and press Enter. The system will now startup again.
When you restart, the first thing you will notice is that something called GRUB loads. This is the Ubuntu bootloader. Select the top option, and press Enter.
Ubuntu will now start up. The login screen will appear. Simply type in your username and password you selected, and GNOME, Ubuntu’s window manager, will start up.
If asked to install updates, install them straight away. I had 98 to install. Note that these updates arent just for Ubuntu, but for any software you have installed through the package manager (explained later).

After installation, reboot, and start up again. Now let’s start using Ubuntu.
Let’s have a look at the desktop:
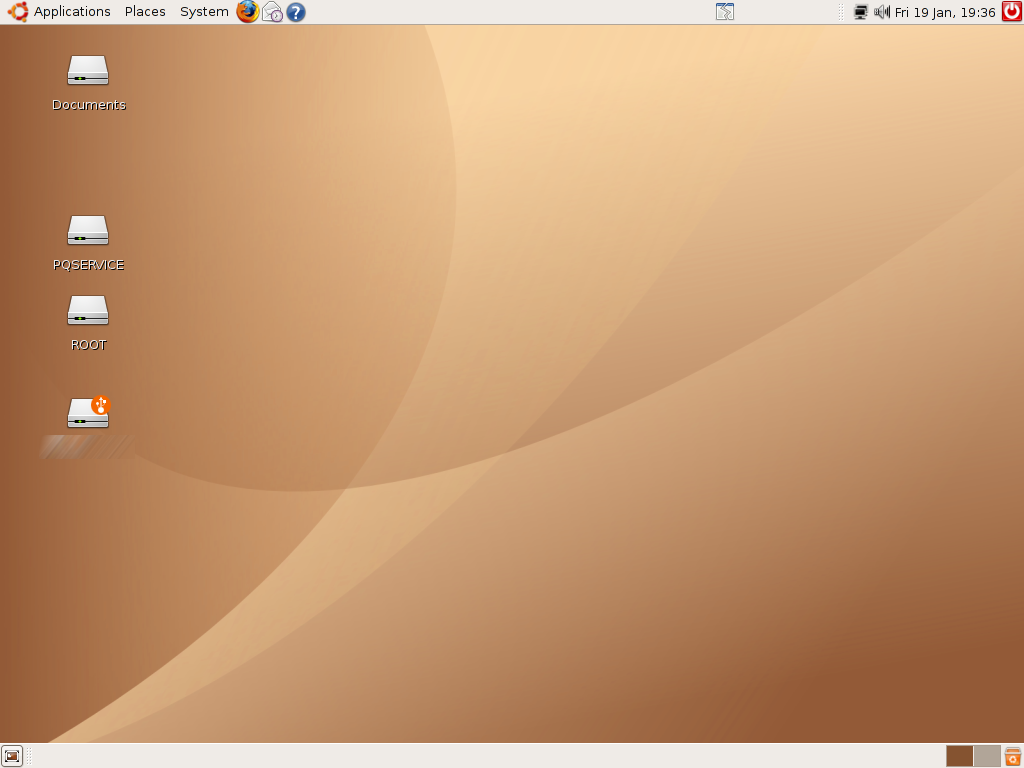
By default, the top bar is a combination of application launcher, quick launch bar, and system tray. The bottom bar is a combination of taskbar and workspace switcher. A workspace is effectively a virtual additional monitor.
Installing new software
Click on Applications, and you’ll see a list of installed applications, divided into categories. Ubuntu, like many other pieces of software, comes with a package manager, which lists hundreds of pieces of software that are all ready to install straight away. Click Add/Remove.
Now you can see a list of the software that you can install. To install software, just click on the little checkbox next to it, and click Apply. You can click on many pieces of software then install them all at once if you like.
Sometimes when installing software the package manager will ask about dependencies. This is fine, just allow it to do it. Some pieces of software require other things to be installed to be able to run.
Obviously the package manager doesn’t contain every single piece of software ever – that would be impossible. For example, Opera web browser is not in there.
To install software that is not in the package manager, first we need to know whether they offer a Linux version. The easiest way to do this is to go to the website of the software and see if there’s a Linux version. At Opera.com, there is a version for Linux that I can download. At first, you may be confused by the huge array of things to download. For Ubuntu Linux, you need to download a .deb installer package. Just select to open it, and the installer will install it for you.
You may have noticed that you have been asked to put in a password for Administrative tasks – this is just the password you set at the beginning.
Further info on installing software in Ubuntu is available here
Everyday tasks
We all browse the web. For this, Ubuntu has Firefox installed by default, although Opera for Linux is available from Opera.com, and various other browsers are available through the package manager.
Word Processing is done through the OpenOffice.org writer, which mimics MS Word, and is quite powerful. Abiword is also available through the package manager.
When it comes to listening to music, I would recommend the VLC music player, which is available through the sound and video section of the package manager.
Gaim and Kopete are good instant messagers, which support various protocols.
Virus scanning in Linux is available, although unnecessary. While there may be around 120,000 Viruses on Windows, there probably aren’t more than 500 on Linux. If you’re still feeling security-conscious, there’s a Virus Scanner in the package manager under System Tools.
The Filesystem
As you will have already realised, Windows and Linux are very different in many rather large ways. One of the most difficult things to get your head around is the structure of the filesystem, which, I admit, is rather hard to understand at first. I still have to keep googling things to find out where everything is kept. Here’s a quick run-down:
There is no C:, D:, etc. You have a root filesystem, which contains a few folders like /media and /usr and stuff. Seperate hard drives are mounted onto the desktop, to allow quick access, and are held in /media/ then the filesystem. USB drives are listed under their drive label, for example if in Windows a usb disk appeared as ‘Matts Flash Drive (F:)’ it would appear as /media/Matts Flash Drive/
/home/username/ is basically the same as C:/Documents and Settings/username/
/usr/lib/ is basically the same as C:/Program Files/
/usr/share/fonts/ is like C:/WINDOWS/Fonts (There’s a nice guide on how to install fonts in Ubuntu here)
These are really the only important ones that you will need to know. I wouldn’t recommend going poking around anywhere else.
Flash and Java
I’m sure many of you are desperate to get on RuneScape or watch the funny video someone posted in Non-RuneScape related media. To get Java working, simply install Java and the java plugins in the package manager. To get flash working in Firefox, Mozilla or Seamonkey, do the same thing.
Because Adobe hates Opera, though, to get it working in Opera, follow these steps:
1. Go to the flash download site and download the tar.gz, NOT the rpm. Save it to your desktop.
2. Once it has downloaded, right click on the .tar.gz file and select Open With Archive Manager.
3. Click Extract, then close the archive manager.
4. There should be a folder called adobe_flash_player_9_linux on your desktop.
5. Close Opera
6. Press Alt+F2 (the equivalent of Ctrl+R in windows), and type this:gksudo nautilus
Then press enter. You will have to enter your admin password.
7. Click File System at the side
8. Navigate to /home/your username/Desktop/adobe_flash_player_9_linux/
9. Select the files flashplayer.xpt and libflashplayer.so, and press Ctrl+C to copy them
10. Now navigate to /usr/lib/opera/plugins and press Ctrl+V to paste.
11. Open Opera again, and it should now work. It can be quite unstable with heavy flash things, but youtube has been working fine for me so far.
Customising your interface
GNOME, the window manager that is set by default in Ubuntu, is highly customisable. You can set skins and change the panels at the top and bottom of your screen. And you can change your desktop background from that ugly Ubuntu default one.
To change desktop background, simply right click on the desktop -> change background -> add background, and navigate to the image you want.
To change the colour/transparency of a panel, right click on it, click properties -> background -> select solid colour, change the colour, and select a transparency.
To add something to a panel as a kind of quick launch icon, right click on the panel -> add to panel. There are a few default things to add, like lock screen or a force quit button, or a processor monitor. If you want to add an application which appears in the applications menu, click on ‘Application Launcher’ at the top, and select it. To add anything, select it and click Add.
To move things around on your panels, right click on them and click move, then move your mouse and click again when you’re finished.
To change the skin, borders around your windows, etc, go System -> preferences -> themes and change it. If you want to add more themes, you can go to http://art.gnome.org/themes to download more.
To customise your interface further, download this .deb installer file and install it: http://www.getdeb.net/getdeb.php?file=gnome-hideseek_0.6.0-1getdeb1_i386.deb – It is an installer to a package that allows further customisation of your interface, including putting a My Computer-equivalent icon on your desktop, as well as trash, which are not there by default in Ubuntu (dont ask me why not). After installation of that package, just go System -> Preferences -> Hidden Preferences -> Desktop -> Icons -> and select to view them on the desktop.
To create an icon of a program on the desktop, simply drag it from the Applications menu onto the desktop. It is often a better idea, however, just to make a custom launcher on one of your panels.
Here is my fully customised desktop:

Now, just play around. Obviously don’t go rummaging in system files under root, but play around, try making some graphics in gimp, or doing your next piece of homework in OpenOffice. You might be surprised by the power of Linux, and some of its software.
If you have any problems, feel free to PM me on the RSBandB forums.
 Search